Friends! Today is the DAY! Master bathroom makeover reveal day!
I wanted to wait until the last little pieces had arrived and were installed before sharing the reveal of our master bathroom makeover with you all, so while it took a little longer than I had hoped, I am so excited to share what we accomplished!
To catch any of you up who may have missed THIS post, my husband and I traded in our weekend getaway to San Diego for a weekend making over our bathroom together. Canceling the trip was a very last minute decision so we didn’t have much time to decide what we wanted to do to, or what we could really manage, but we did our best and I am excited to show you!
Oh! And none of it would have been possible without the help from my in-laws, who still kept the kiddos for us over the weekend so we could make this whole endeavor possible.
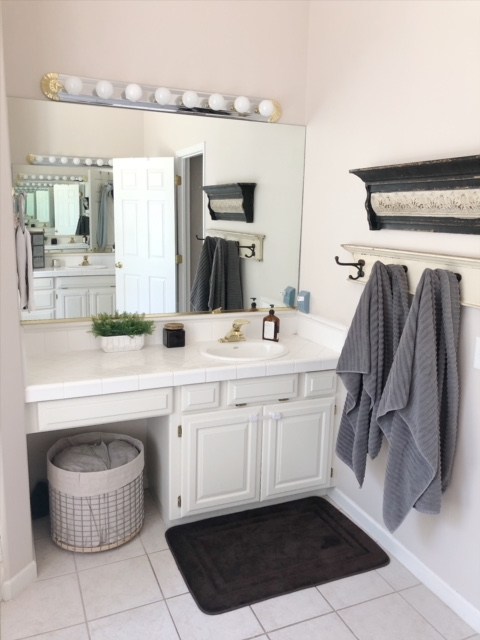
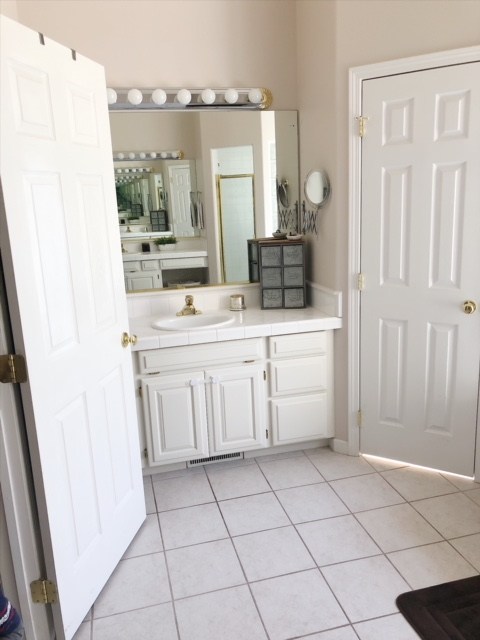
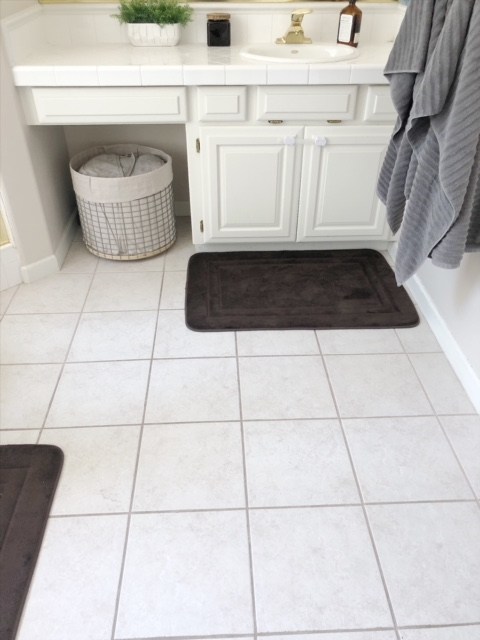
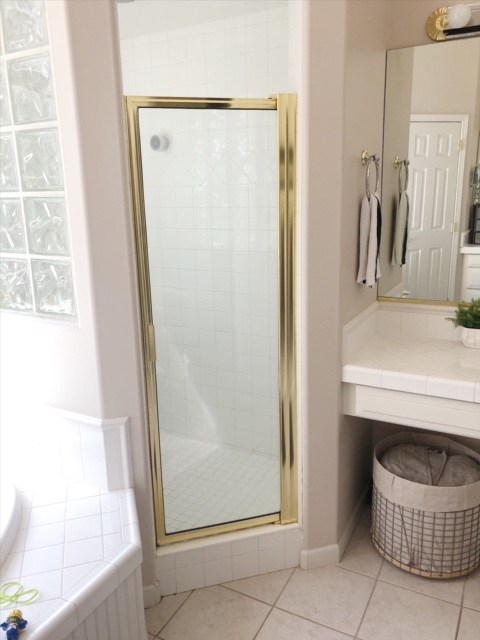
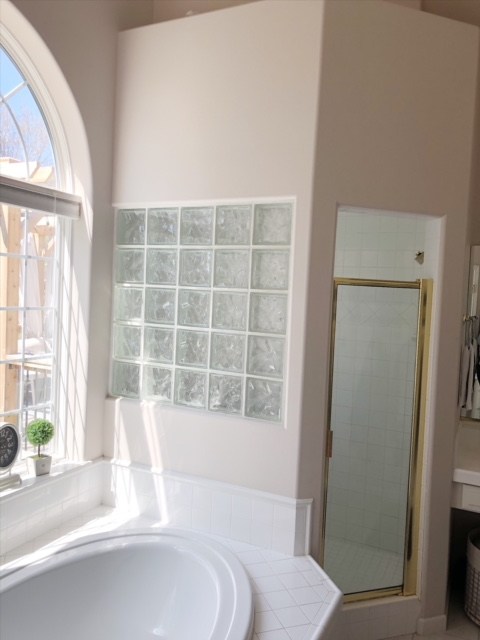
So, just a few reminders of what the bathroom looked like before…
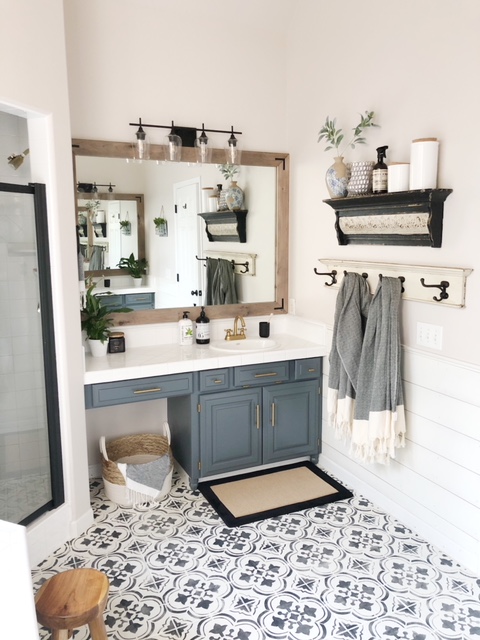
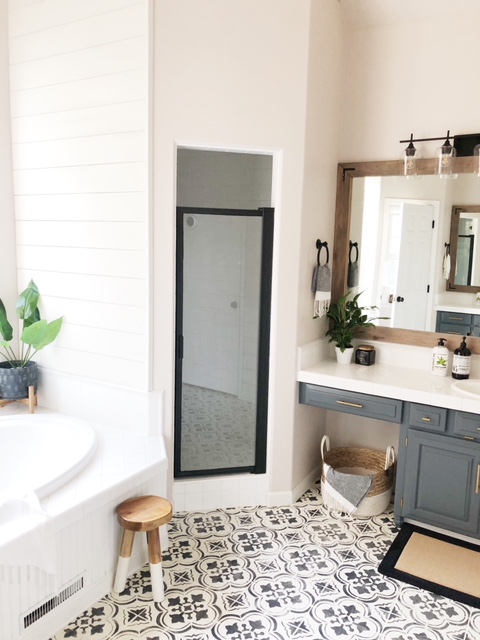
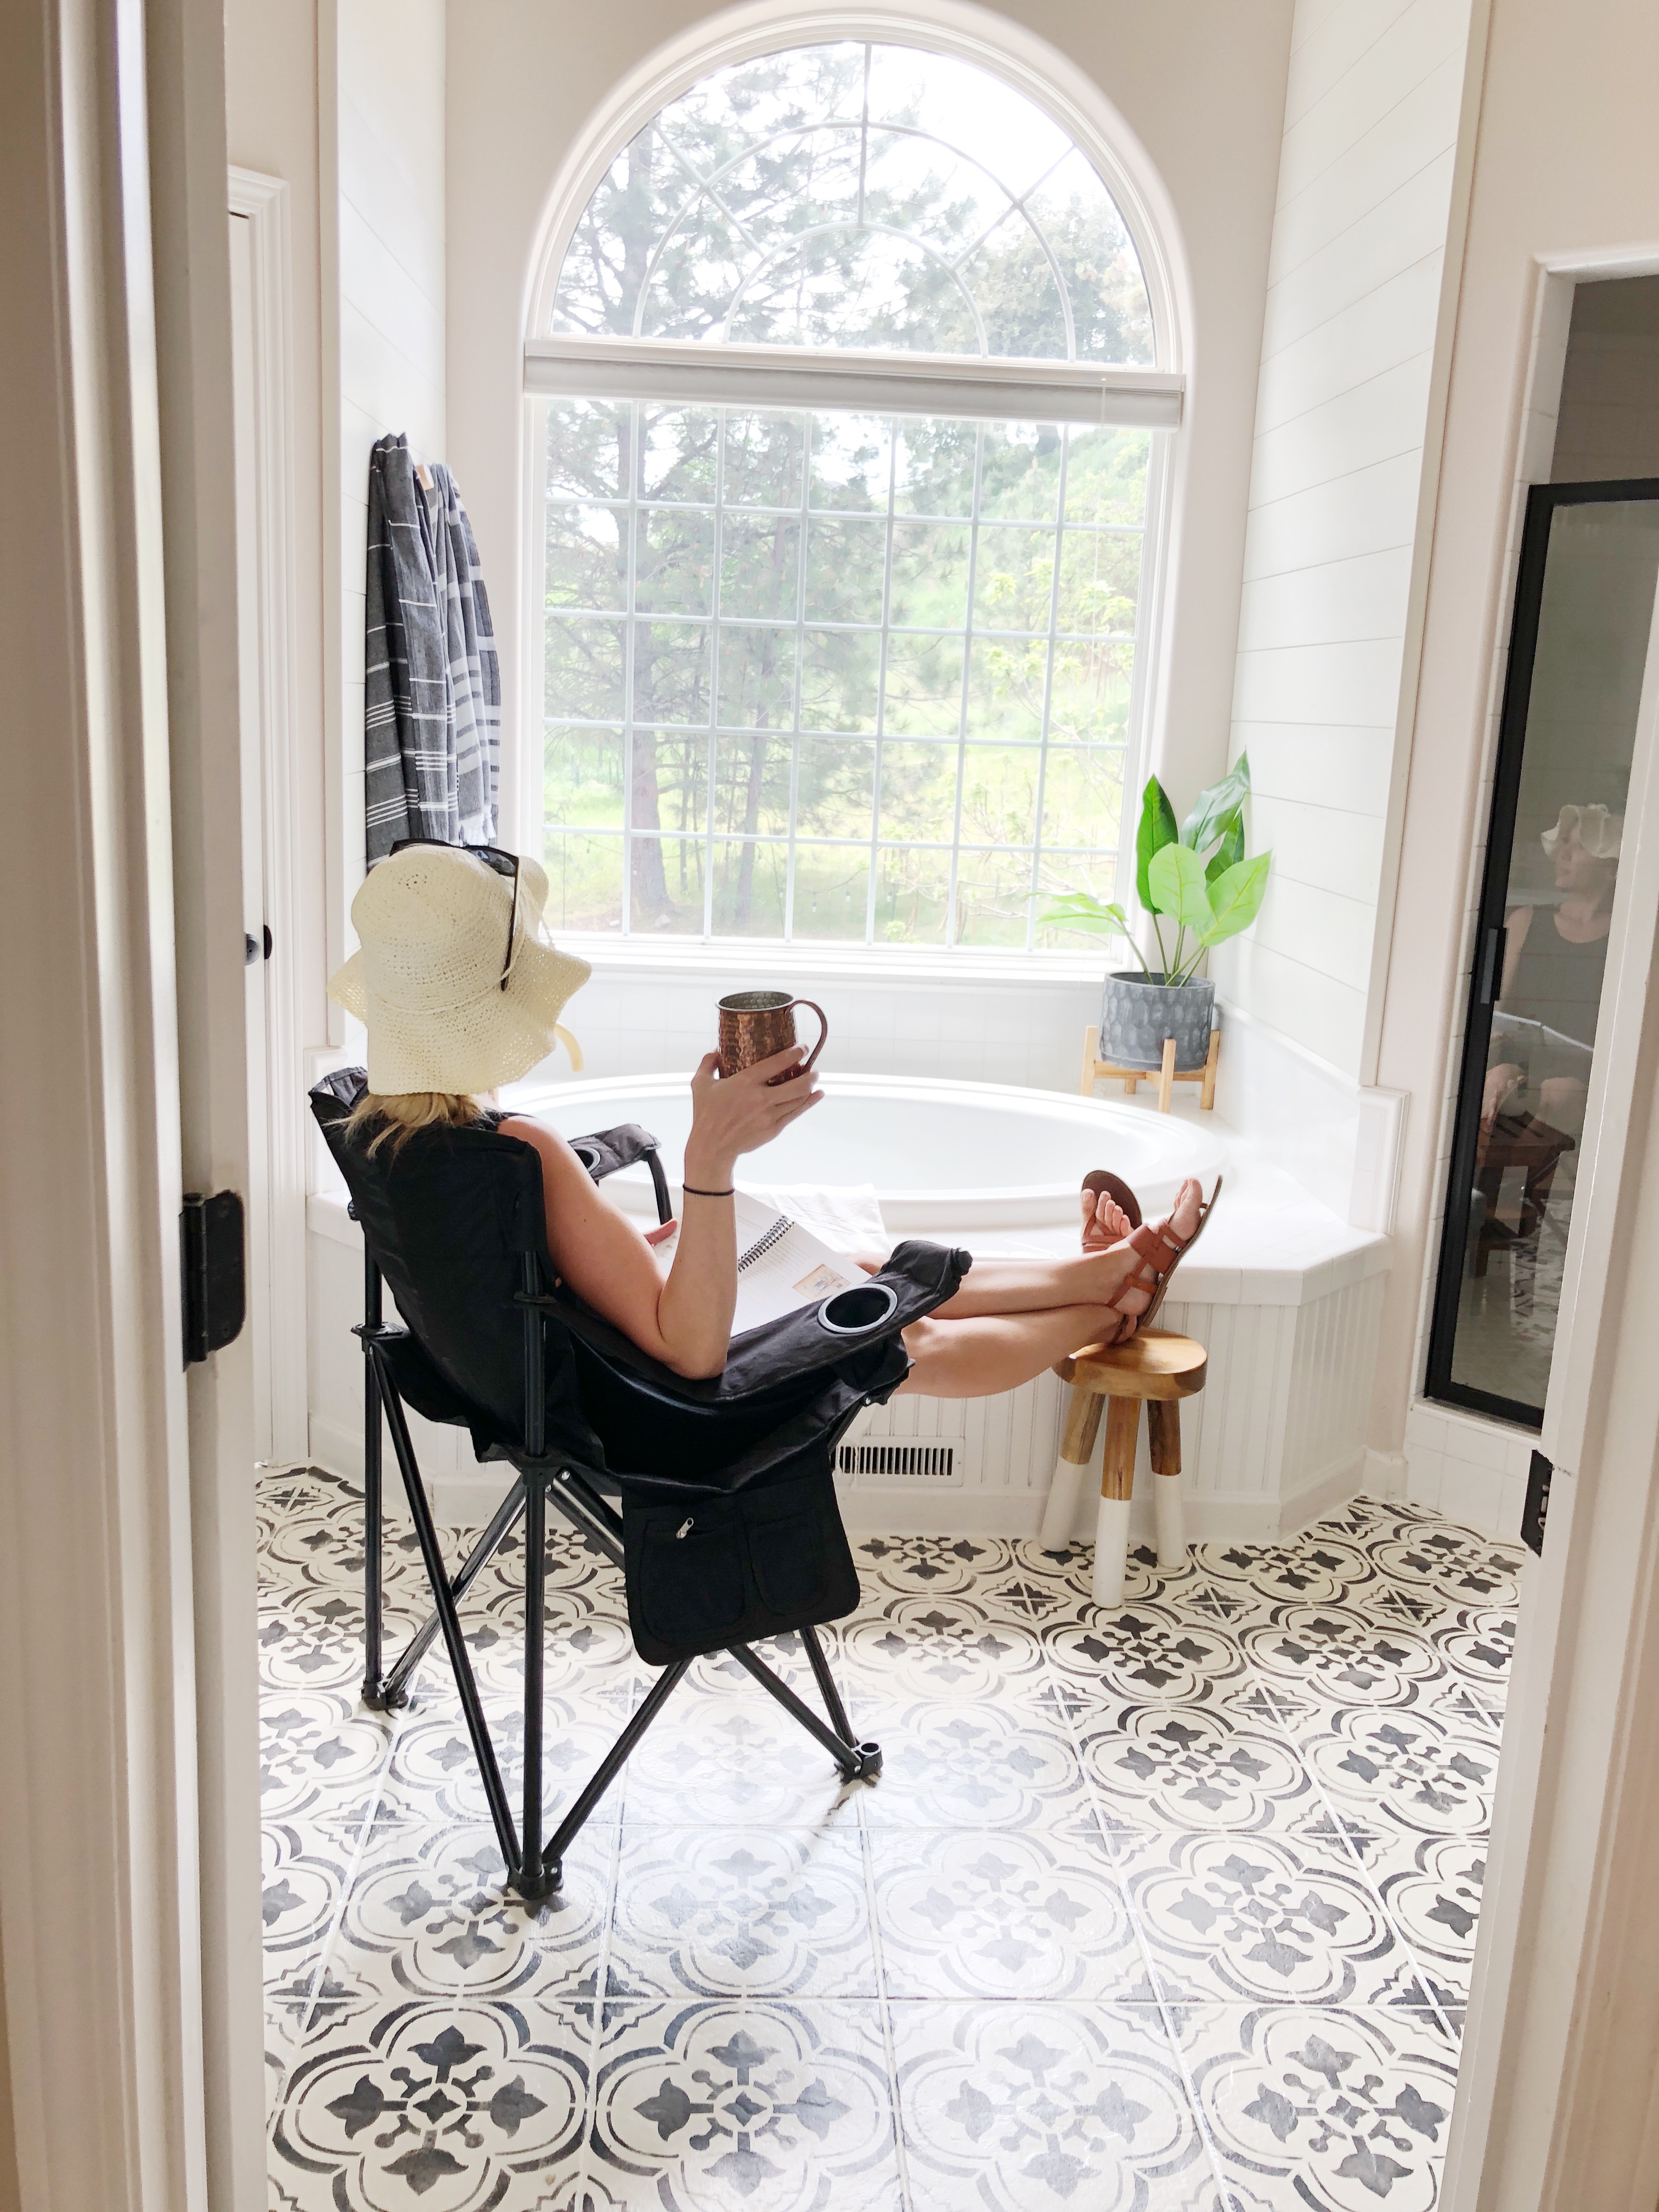
And the afters!
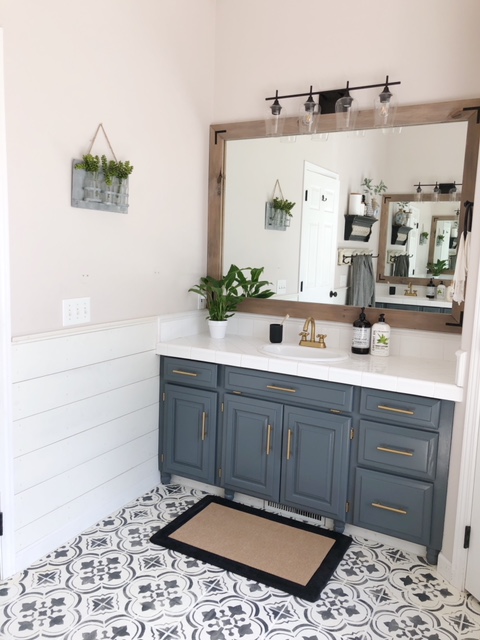
We are still in awe over how it turned out! I would say the biggest difference is the floors. I painted and then stenciled a Moroccan pattern on them and I just can’t stop staring! Is it weird I kind-of want to sleep in here?! 😉 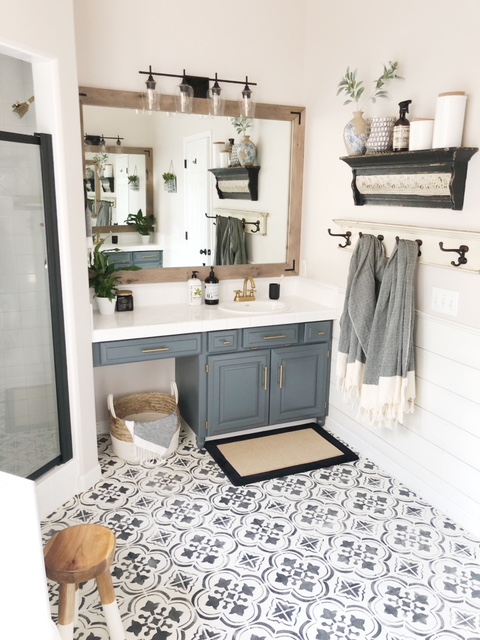
We also painted our gold shower door black, and gosh, that instantly made everything feel updated.
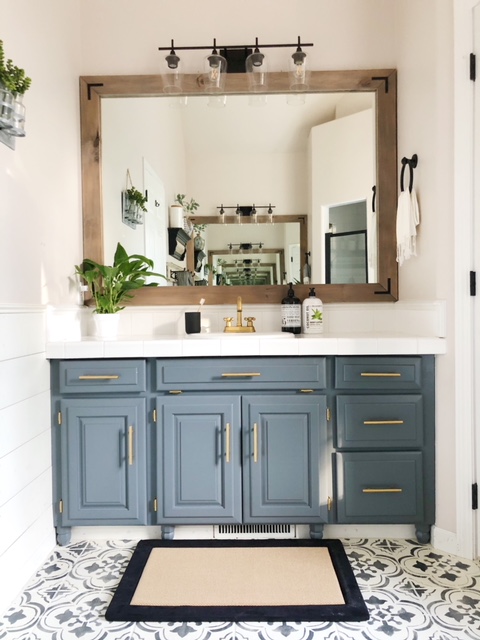
We painted the cabinets in “Wall Street” by Sherwin Williams, and I bought some cheap nickel pulls from Amazon, painted them gold and then buffed them With Rub ‘n Buff to make them more bronze. I also used the same buffing cream on all of the hinges, too. 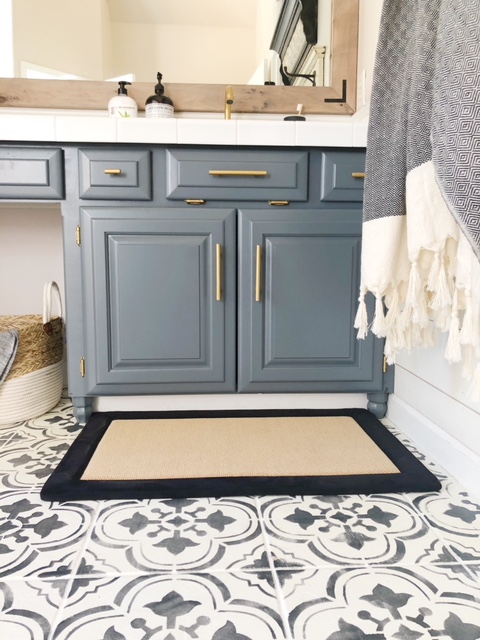
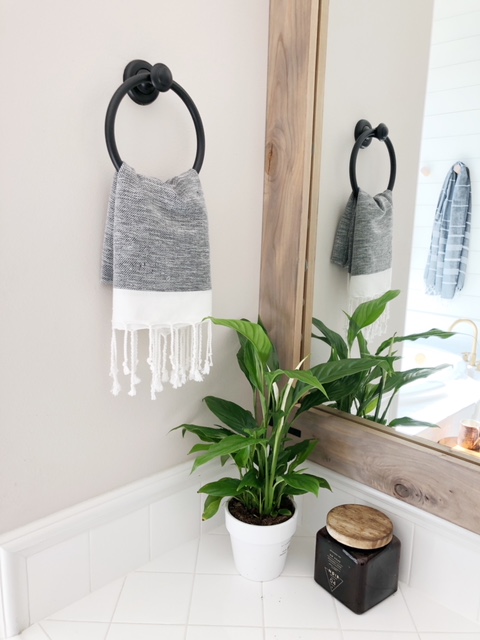
Another big change is that we put frames around our builder-grade mirrors and added some black hardware to give it some character. I am LOVING the difference! We also put up new light fixtures and added little “feet” under the cabinets to make them look a little more custom.
A small little detail that made a big difference was changing out the doorknobs and hinges.
I also bought some inexpensive faucets and again painted them gold and used the buffing cream on them as well.


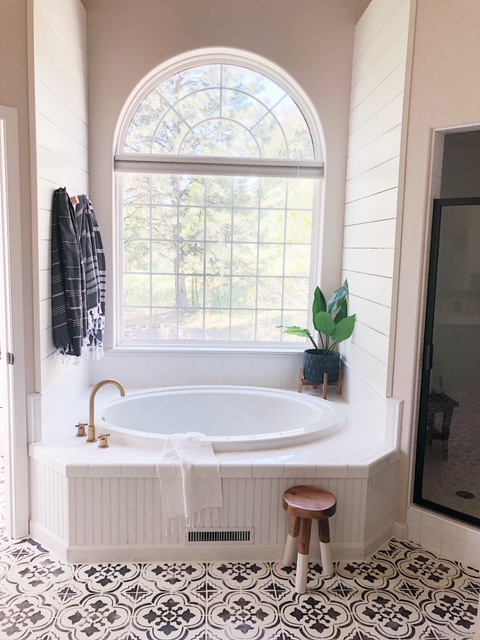
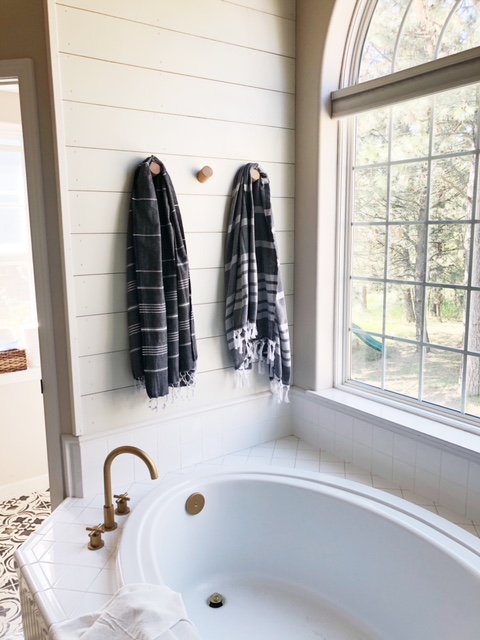
We then added some shiplap to both of the walls surrounding the bathtub to give the space some character, but to also cover the glass blocks we really didn’t care for.
Another fixture updated with the same process.

And to make everything a little more cohesive, we also added shiplap to the two little walls surrounding the door, which also covers where we may have had a few paint smudges from painting the cabinets! 🙂
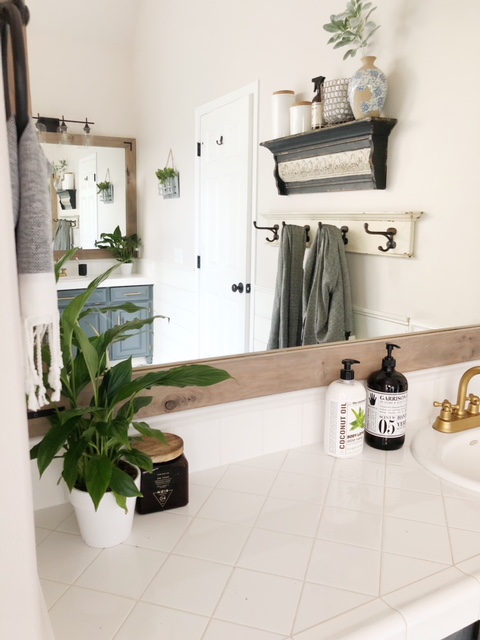
I am still looking for something to put where that tiny little metal vase holder is, so if you know of something you think would look great in this big spot, let me know!
And just a small little detail, but we painted our existing towel holders which helped update the look, too.
Who needs San Diego, right?!
Tutorials on how we did some of these projects coming soon!
Sources: (Click on underlined words for links)
Sink Faucet – (Gold Spray Paint ) (Rub ‘N Buff)
Counter plants- Lowes
Bath towels HERE, HERE and HERE
Basket- Homegoods
Soap and Lotion- TJ Maxx
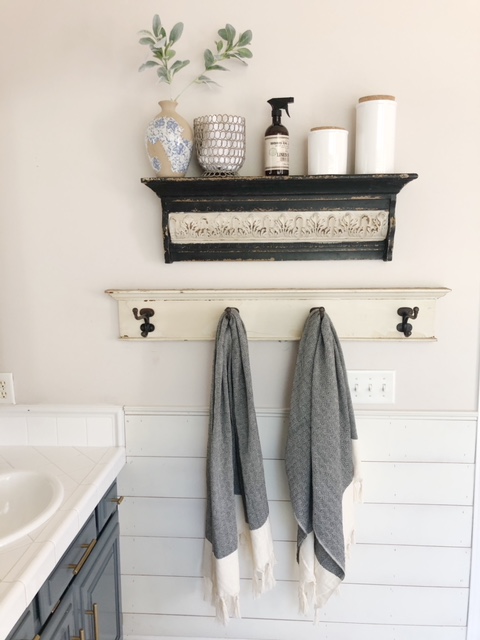
Shelf and everything on it except the linen spray is from Hobby Lobby
Linen Spray- Homegoods
Planter- Homegoods
Stencil for floors- Cutting Edge Stencils
*This post contains affiliate links


It looks so gorgeous! Thats sweet of your in laws to help with the kids. Gives you more time and energy to focus on the bathroom. You make it so convenient by having the resources listed out. You guys did an amazing job.
THANK YOU! I am just thrilled! And YES! It would have been SO much harder without their help! Thank you for the kind words!
So beautiful. I am looking for the stencil you used. Is it the Santa Ana Stencil? Did you leave the color of the tiles and which paint did you use? Sorry for all those questions but I am in love with your tiles. 😃
This cracks me up! My name is Rebecca as well and I have the same questions!
Wow this looks amazing! I am super curious how your tile floors will hold up. Please let us know!!
Would love to know where you got the hooks that holds the bath towels on the big white shelf please?
Beautiful bathroom!
Thank you
Looks so amazing!! You are awesome. I just can’t believe the transformation! Great job! I think I would want to live in there lol
You are so sweet! Thank you for the huge smile!
I thought the before looked nice but the transformation is beyond AMAZING! You did such a good job!
Hahaha that’s kind-of what my husband I were saying, too! The before really wasn’t bad at all! Just wanted to make over a bit! Thank you for the kind words!
WOW! I’m obsessed with that bath tub, and those floor tiles!! This is so beautiful!
Ahhhhh thank you SO much!!! Those tiles still have me swooning!
This bathroom came out AMAZING! I’m using the gorgeous floor times and ship lap as inspiration for our new bathroom. Where did you get the floor tiles?!
WOW a bathroom fit for a King! I absolutely love it. The floor tile are epic and the brushed gold handles/ taps are so lovely! Can you come and do my bathroom too please? 😉
You are too sweet! You got it! I will be over shortly!
Wow! What an amazing transformation! You must be really happy with yourself. Nice choice on the grey cabinets and the rustic wood mirror. Thanks for sharing!
THANK YOU so much!! Yes, we love it!!
HOLY MOLY! Your bathroom looks like a spa! I am in love with the tile!
Ahhhhh thank you! That’s what we think, too! Spa day, anyone?!
So beautiful and peaceful! This looks like a wonderful remodel! Enjoy!
Thank you so very much! I appreciate the kind words!
I love what you did here!! We’re looking into a bathroom Reno for our early 2000’s house and this totally inspired me!
Ahhh I am so glad to hear this! THank you!!!
Looks amazing! I am definitely bookmarking this to make some small changes to my bathroom too!
Denise // theelleaesthetic.com/
Awww I am so glad to hear this! Thank you so much!!
Wondering if you can share the paint and colors for the floor- I love it so much and have been looking to do similar! You don’t happen to have a tutorial??? I love how they came out! Beautiful job!!
This looks amazing!! We are thinking about painting our cabinets in the bathroom we are renovating the same color. I was wondering where you got the towel rack that is in both the before and after pictures? Absolutely love it!
Do you have the link to the small metal things in each Corner of the mirror??
Wondering the same thing
Luv the floors! Please tell me the type of paint you used and how well they are holding up.
I am so glad! I used 123 primer tinted to the white color I liked, and then Behr’s best paint for the dark gray and topped it with a poly!
I LOVE your floors!! How did you get the gray stenciling to look weathered/worn?
Hi there absolutely stunning can you please share where the mirror is from?
When painting your cabinets did you use a specific kind of paint? Any pointers?
I want to paint mine!!
We used the best cabinet paint Sherwin Williams had, as recommended to me! Quality paint matters! And if painting over paint, it should adhere pretty well. If painting over stain, you’ll need to sand. 🙂
What a transformation! I have a similar before bathroom but dont want to spend a ton of money to remove everything when I can use re-vamp what I have! Do you have a tutorial for your flooring?
I forgot to ask too, what color did you use on your flooring?
Thank yoU!
What color was used on your flooring please? Thanks!
This make-over was amazing. Could you tell me what type of paint you and buffing product you used for the sink fixtures? I’m also curious to know how well your the paint job held up on the fixtures for the sink and tub and cabinet pulls?
Bonjour, pourriez-vous me donner le nom de la couleur exact de vos meubles ?
Votre salle de bain et magnifique !
Wow! Love your bathroom. Can you tell me the type of wood and stain you used for your mirror? It is EXACTLY the look I’m going for. Thanks!!
What exact stain did you use for the mirror????
What color were the walls?
I would love to know where you found your light bar above the vanity, it is Gorgeous, Love Love Love it!!!
Yes, same! Love that light fixture.
was there a tutorial you followed for painting the shower gold trim? What type of paint did you use and what color?
What resource did you use or can you share how you painted the caninets
Beautiful & so smart how you guy did updates just by simply painting different items! Your link for the vanity mirrors goes to the vanity lights – how did you do the mirrors?
The link to the mirror listed about when to the lights. Where did you get the mirror? I’m so in love!!!
The link to the mirror listed above when to the lights. Where did you get the mirror? I’m so in love!!!
I absolutely love this bathroom. Do you mind messaging me and telling me what color you used for the stencil on the floor? I am curious to try it myself. Thanks!
What color is the blue for your cabinets?!
Hi! Wondering how you painted the shower trim? Amazing!
Hi! I don’t know if you still look at comments from this post, but I LOVE what you did and would pay so much to have the same done to my bathroom! Can’t believe you did it yourself in a weekend! Could you share a tutorial on how you did the mirror and what type of Sherman Williams paint you used on the cabinets? Thank you sooo much!
Where is the mirror from? Love it!
Love your vanity, I’m looking for one just like it, 60”L with single sink on the right side and make up station on the left side open to fit a chair.
Where can I find one ?
Hello! LOVE your bathroom remodel! I am wondering where you got your mirror frame. When I click on your mirror link, it takes me to your light fixture on Amazon.
What color did you use to stencil the floors?
Hi! What black paint did you use for the shower?
The vanity is different from one pic to the next. One has no opening for a vanity chair, and the other does. Inconsistent pics…
Looks amazing!!
where did you find that bath cabinet with the make table attached?
Hi! This is absolutely stunning and hopefully two years later you’re still enjoying the updates you’ve made. I know it’s a long shot but any chance you still have the links to the mirrors handy? The current link actually goes to the light fixtures on Amazon rather than a mirror. Appreciate it!
What kind of paint did you use for the shower door?
Great weekend project. Love the cabinet color. Very curious to find out how the painted faucets are holding up and what black paint you used for the shower door and how that is holding up. Did you paint it black inside and out. Anxious to begin our master bath makeover.
Looks wonderful. We r just starting on our barthroom.I have bought a navy blue vanity .Will look this week for flooring .love your floor. Yvonne
This looks beautiful. I would love to know how your floors are holding up after a few years? Also I read in the comments that you used Behr paint for the flooring but you do by chance remember the color? I would love to do this to my bathroom floor.
What color did you paint the walls
Where did you purchase your cabinet with sink?
Can you explain the paint treatment you used on the bathroom floor? You said you painted the tiles and then stenciled them. What type of paint covered the tiles? How did you apply? What paint was used to stencil? Thank you!
Robin
Hello, just curious what color stain you used for the mirror frame?
I NEED A NON SLIP BATH MAT
You both did an outstanding job on your bathroom!
Our bathroom floor is old linoleum. Very patchy. 50’s