
My good friend, Kristin, once made a gorgeous charcuterie board while we were visiting them back in Reno and I have wanted to make one ever since. I had been waiting for the right time, but then realized a platter of delicious foods all smushed together is pretty much always welcome, so I decided to go for it this past weekend when we had some friends over.
And I’ve got to say, I absolutely LOVE how it turned out! I think there was a good variety of meats, cheeses, fruits, nuts, and veggies to make it appealing to everyone.

While I was putting this together, I found myself doing a few things which I think helped make it all work and have included those “rules” below:
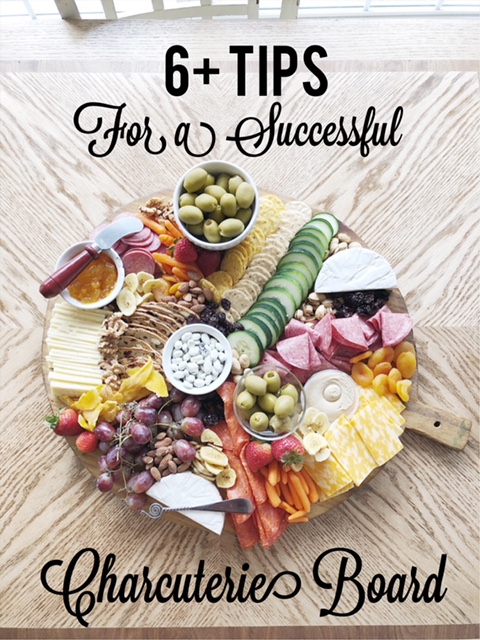
Six Tips for a Successful Charcuterie Board
1- Separate the meats and cheeses somewhat evenly throughout the tray. This allows people to access the main ingredients from all points of the tray.
2- Try folding the meats differently to add some dimension. Examples might include rolling the meat, folding in half, or folding in fourths.
3- Stack crackers and veggies in rows; it just looks nicer than in piles.
4- Use small bowls to contain jams, items that may “leak” like olives, or smaller items, like yogurt raisins
5- Save the small items for last, and fill in any open spaces with those items. Nuts and dried fruits work perfectly for this.
6- Include items that you can layer; cracker/meat/cheese, veggies/hummus, /crackers/jam/soft cheese
Below is everything I included in case you are wanting to make one, too, but aren’t sure what to include.

(Starting with the cucumbers and going clockwise, with each food only being mentioned once)
Cucumbers
Brie Cheese
Dried Cherries
Pistachios
Salami
Dried Apricots
Hummus
Jalapeno Stuffed Olives
Colby/Monterey Jack Cheese Slices
Baby Carrots
Strawberries
Pepperoni Slices
Banana Chips
Almonds
Grapes
Dried Mango
Sharp Cheddar Cheese Slices
Cranberry Almond Crackers
Apricot Jam
Summer Sausage
Blue Cheese Stuffed Olives
Cheddar Nut Thins (a type of Gluten-free cracker)
Salted Nut Thins
Yogurt Covered Raisins
I think these are such a fun thing to serve when having guests over and make it a low-key way to serve food. Once it’s made, it’s made, and the snacking can continue throughout the day whenever people are hungry and there isn’t a need to take any time away from guests to prepare and cook other food.
I think I am a huge charcuterie board making fan!
If looking for a board similar to mine, I have listed a few options below! Be sure to check out the sizes, as well as the prices, to see which one fits your needs best.


I LOVE how you can write on this one to label your foods!

It’s fun how the serving utensils slide out on this one


Thanks for stopping by, friends!
<3 Shannon


I feel like you really analyzed how to approach this tray from the point of a consumer and I love that! Plus I never would have thought to separate meats and cheeses across the board to make them easy to reach.
That is SO kind of you to say! Thank you so very much. Your sweet words are very much appreciated!
I’ve seen these boards before but honestly didn’t know what they were called and that there is such an art to setting them up! You did a fantastic job, it looks beautiful and now I’m hungry!
My goodness, so kind! Thank you! And yes, I want one all over again!
These are all such great tips! I am loving the presentation! It looks so yummy and elegant!
Thank you so very much! I appreciate it!
We love making food boards, they are perfect for the coming holidays.
Yes! I cannot wait to make more!
These are so fun! A couple members of my book club make beautiful ones but I really love how yours turned out! Great tips to help make one!
I so appreciate the kind words! And yes! What a perfect thing for a book club!
Mmm that looks so good! I want to eat everything!
Kasey Ma
TheStyleWright.com
This looks DELICIOUS. I need to get myself a board and do these more often.
I love charcuterie but never tried making my own board!