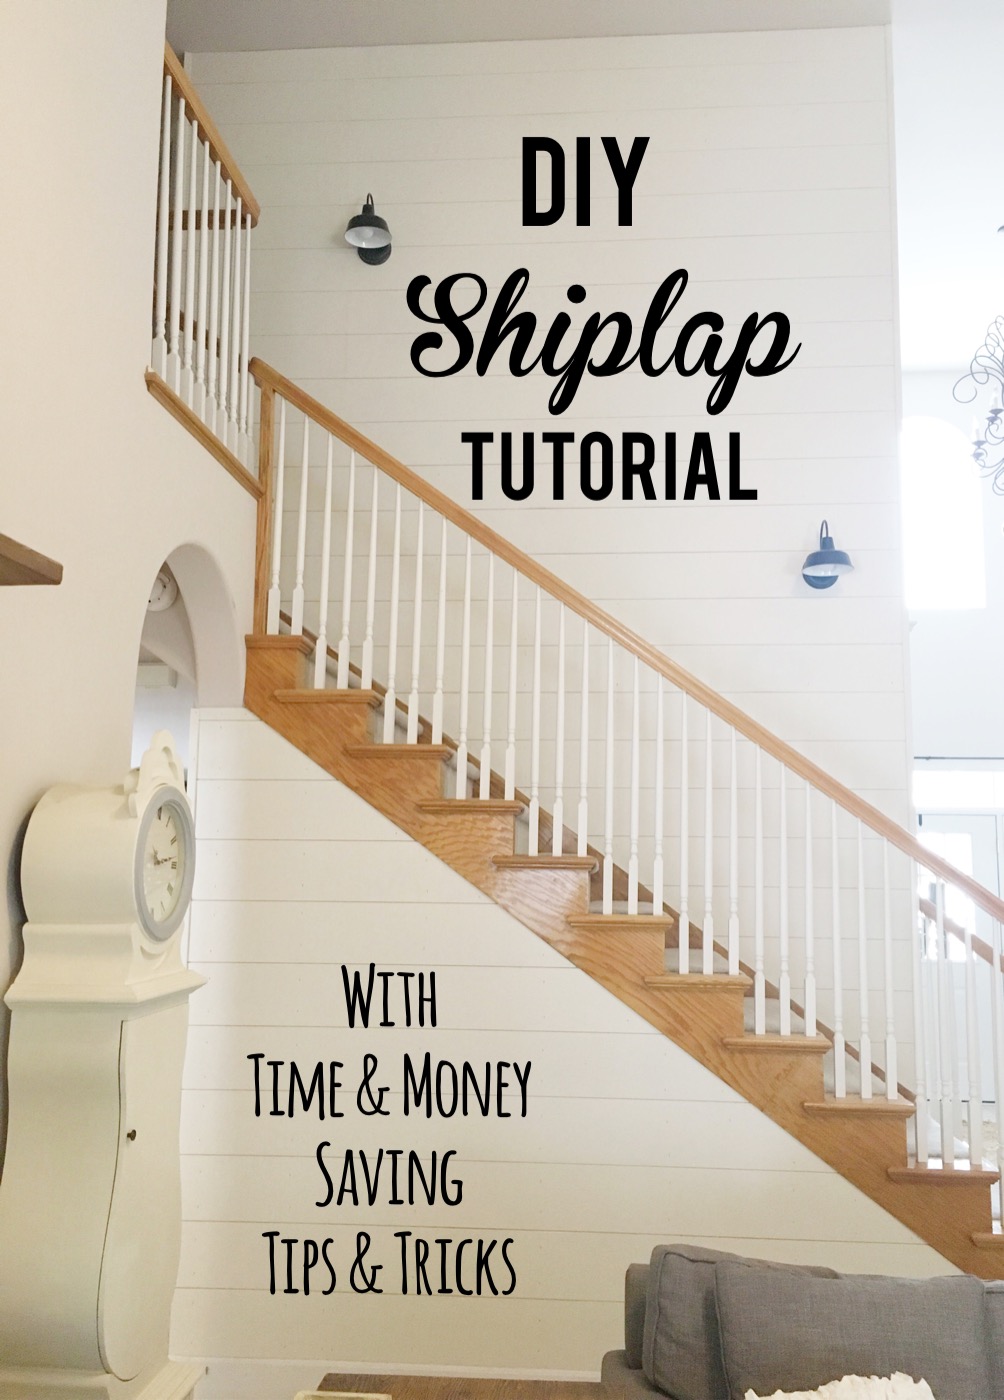

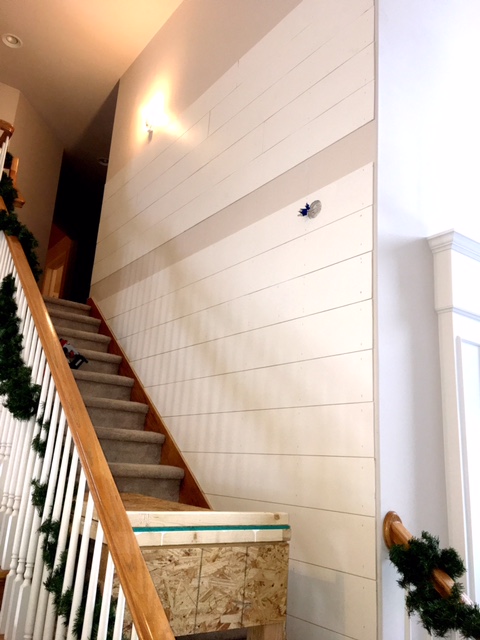
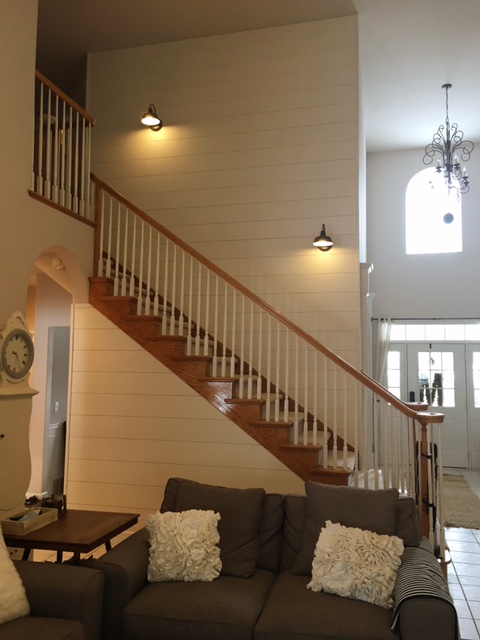
Something I have been wanting to do for a while now thanks to my secret BFF, Joanna Gaines, is to add shiplap to our home. I didn’t really know where to put it, though, until one day I was sitting on the couch and noticed how much empty drywall we have due to our tall ceilings. It just kind-of made things look a little “blah” since I can’t really decorate that high up.
That’s when I realized shiplap would do the trick. Not only do I love how it brightens a room, but it gives so much texture and personality. So, knowing how much I wanted to do this, my husband made it happen for my birthday. Below is a tutorial for just how we made it happen for CHEAP, and the tips and tricks we suggest to save you time and money!
Materials:
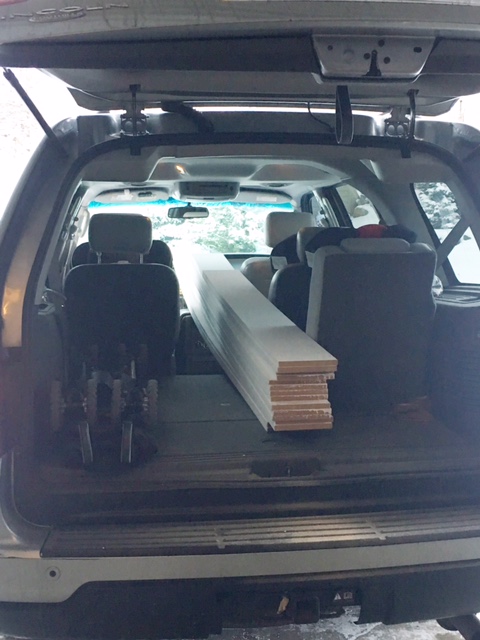
Underlayment (We bought eight 4×8 sheets at approximately $4/board and had leftover)
Trim (1″ 90 degree)
Sandpaper or Random Orbital Sander (sander is much faster- we used 100 grit paper)
Paint in color of choice (We bought a gallon of Behr “Dove White” and had some leftover)
Painting tray
Miter saw or skill saw (we recommend miter saw)
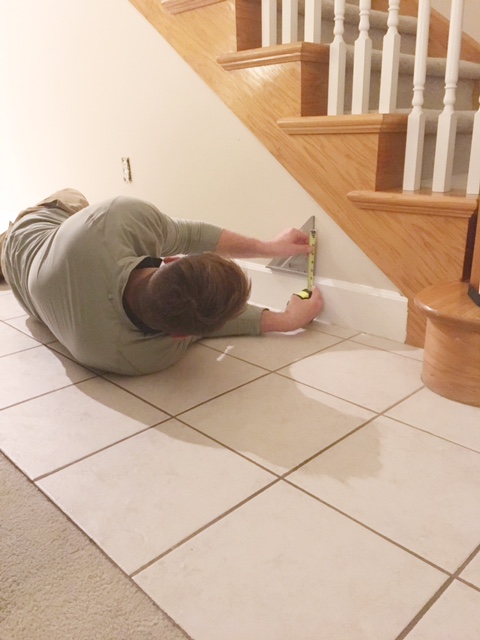
Square and tape measure – to take accurate measurements if you have any angles like we did
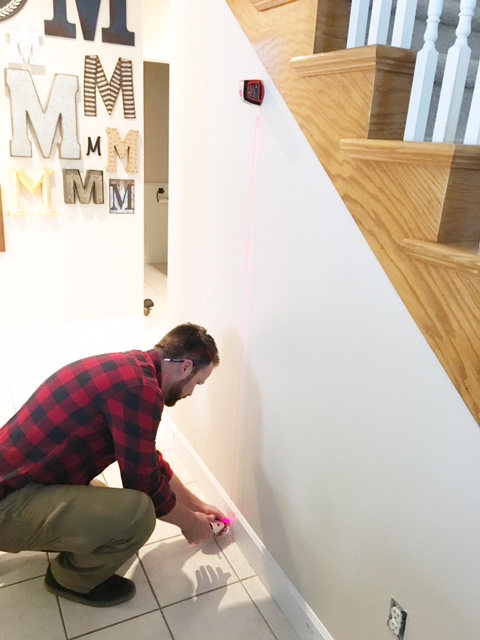
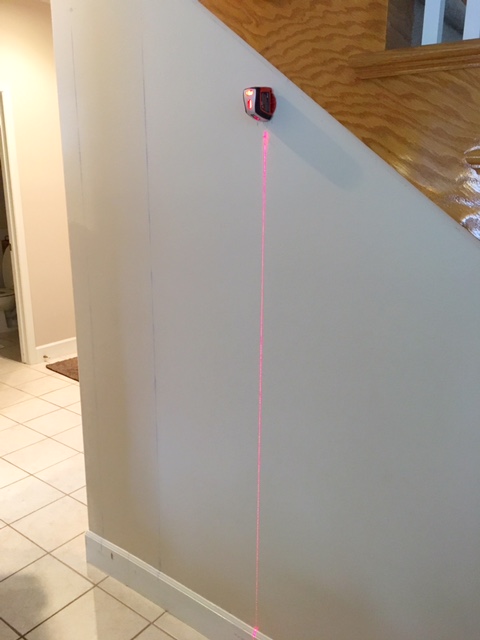
Lazer level (optional)
Pin nailer gun and 1.5″ pin nails
Nickels
Jigsaw – optional (If going around outlets or light fixtures)
Spackle/ joint compound and putty knife (optional if you need/want to fill in the lines/nail holes)
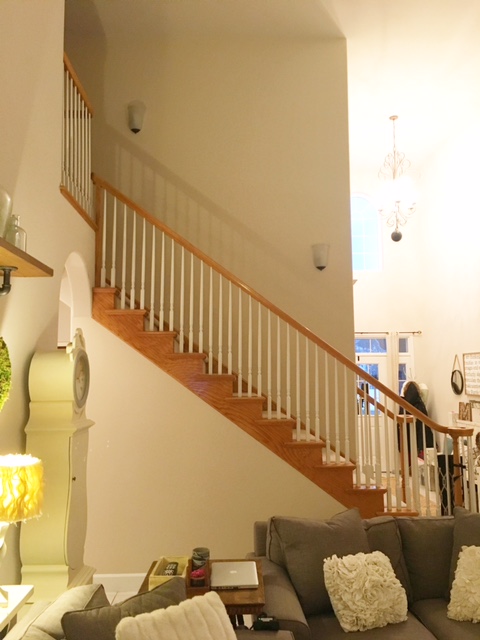
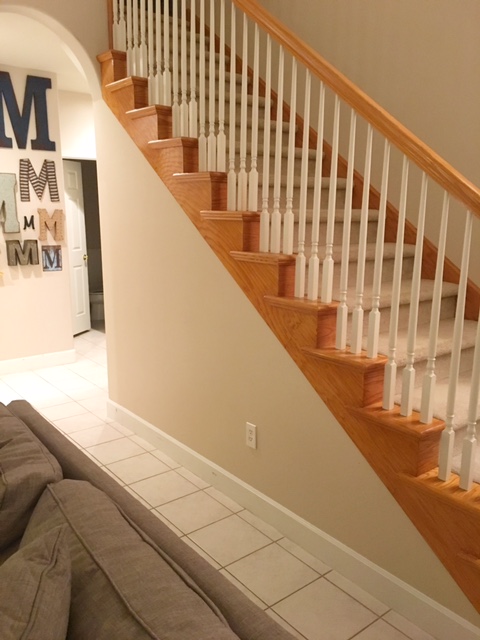
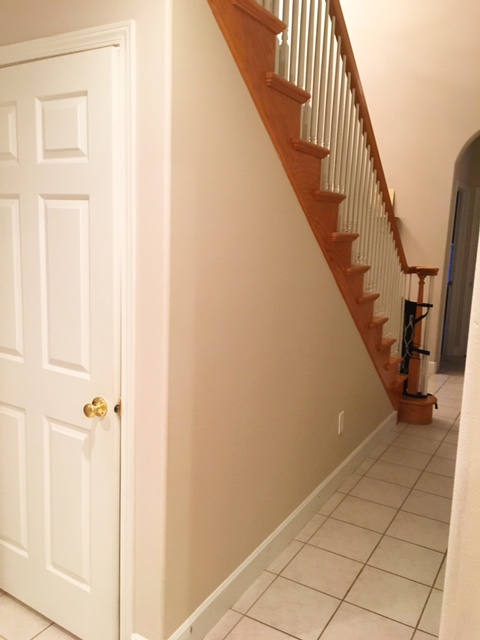
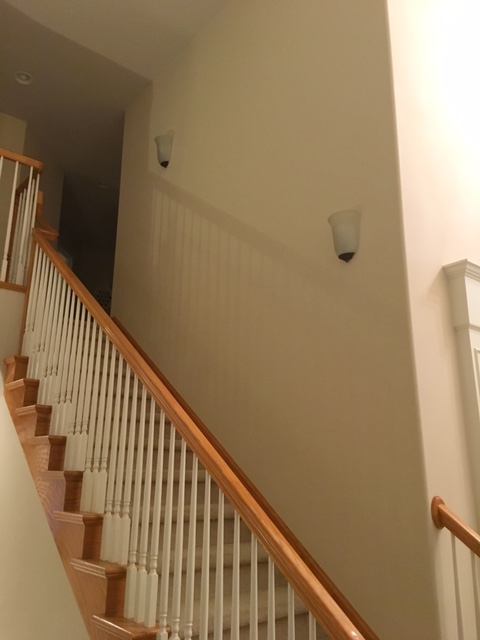
Some before photos…
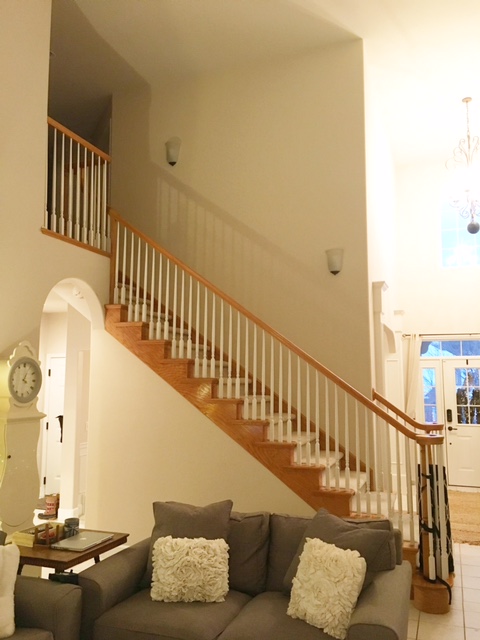
TIP: We originally bought these 8′ MDF boards but quickly realized this was not the way to go. They were too thick, plus quite a bit more than using underlayment. We had read mixed reviews about underlayment, but we ultimately decided to give it a try. We really could not beat the price.
Directions:
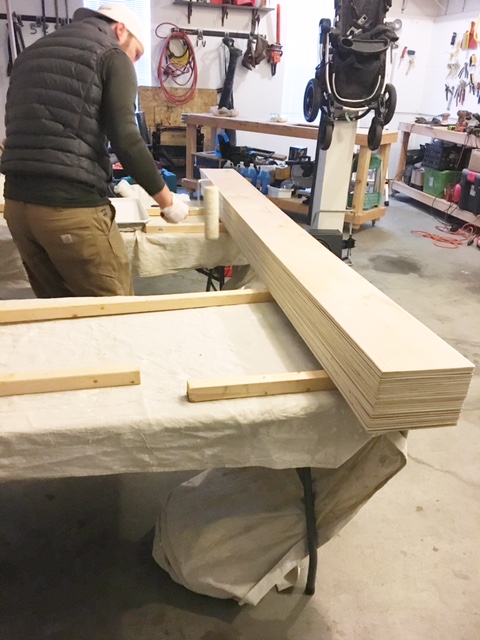
So, back to Home Depot we went, and we bought eight of these underlayment boards and the best part is that the nice people at Home Depot ripped the boards (cut them) at our desired widths (8 inches) for FREE! This was a huge time-saver and was so nice to have done for us.
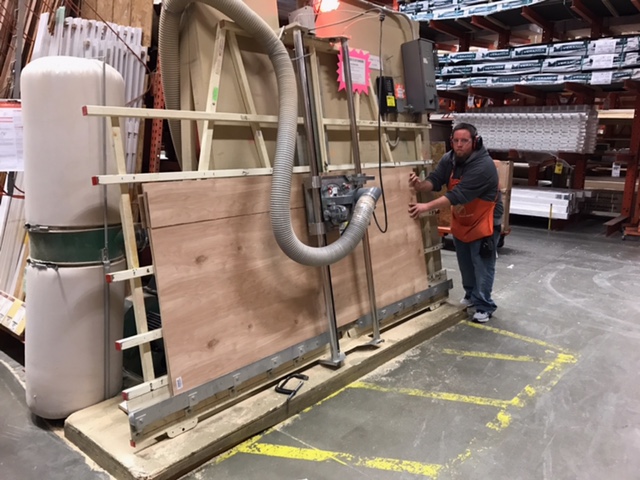
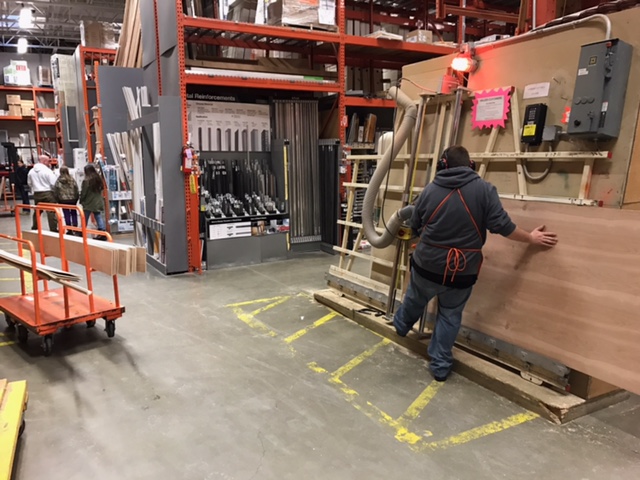
Shopping buddies.

Once home, we sanded the raw edges of the boards using a random orbital sander. You can still sand them down without one of these, but you will save a ton of time and energy if you do have one.
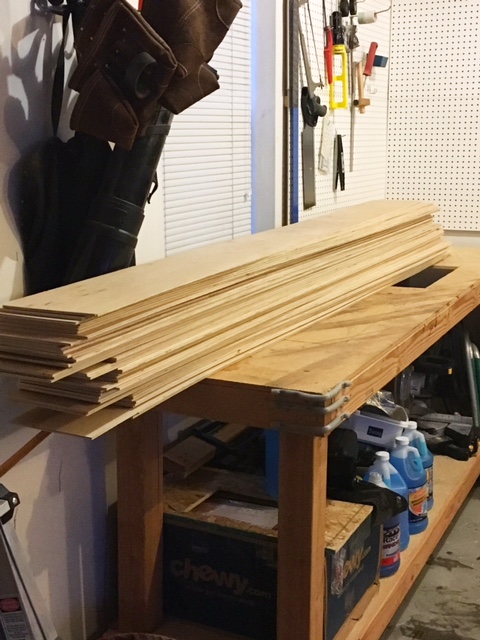
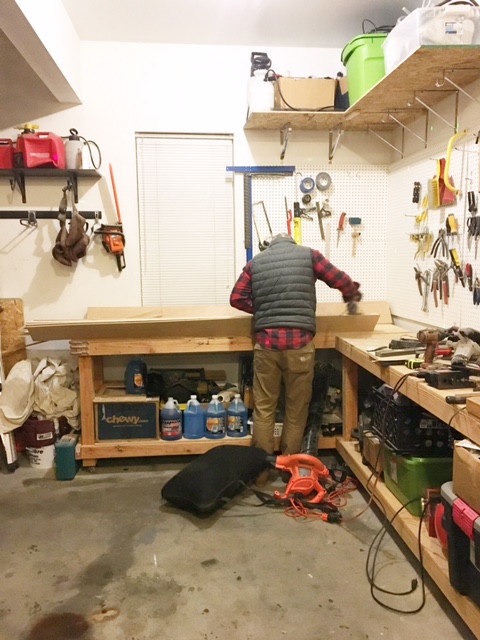
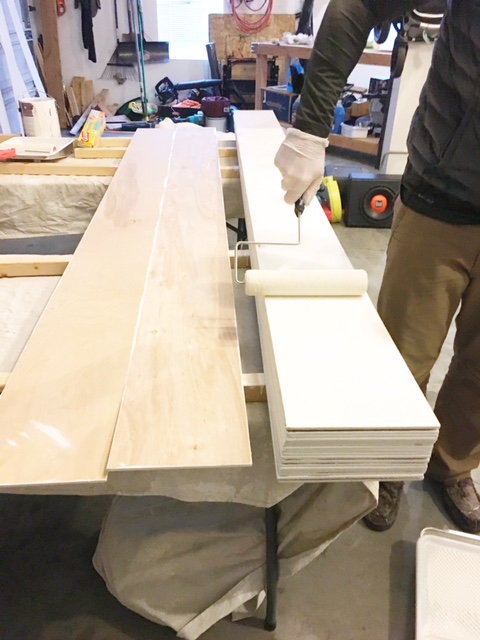
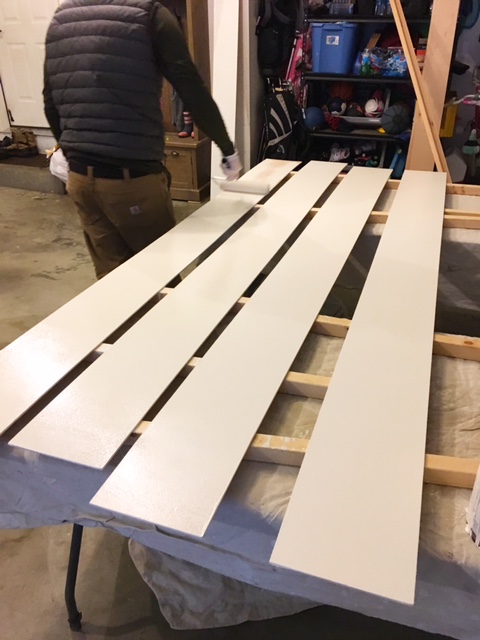
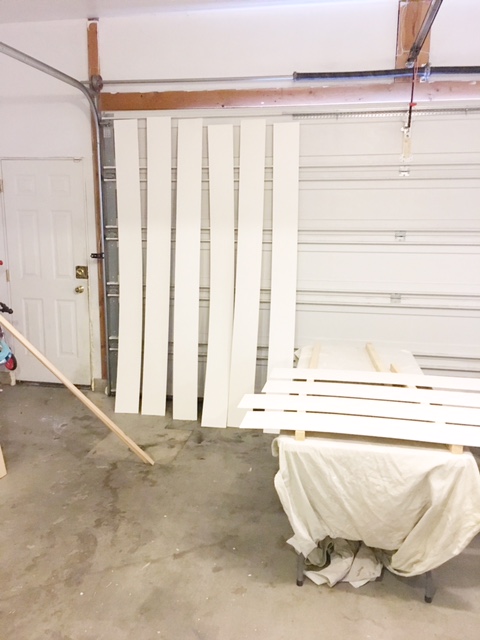
Trick! We found we could save a lot of time during the painting phase by stacking all of the boards up and then painting all of the sides at once.
Then, I stood on the inside of the two tables and my husband on the other and we busted the tops out in no time.
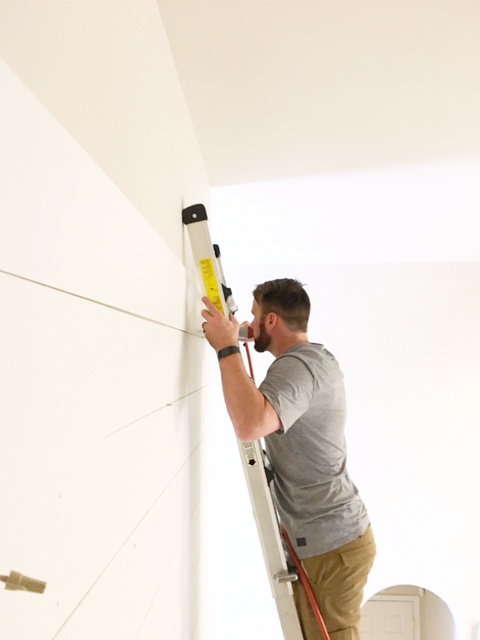
Because we weren’t dealing with straight lines, using a square along with a tape measure helped us to calculate the exact angle we needed to cut our boards.
Then, we took our stud finder to locate the studs and used a laser level to help draw straight lines all the way up so when attaching the boards we knew exactly where to nail them into.
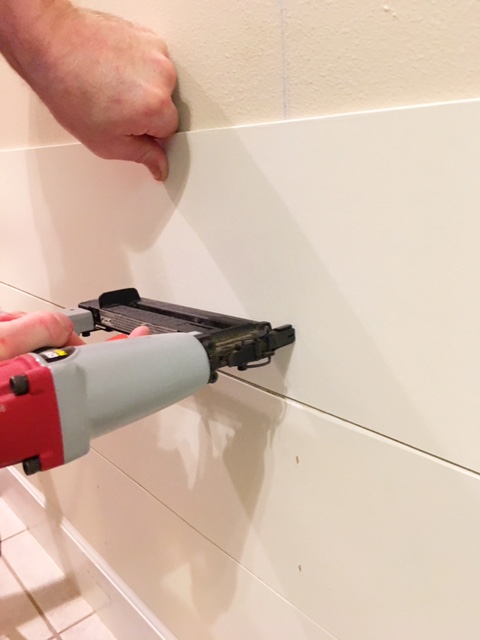
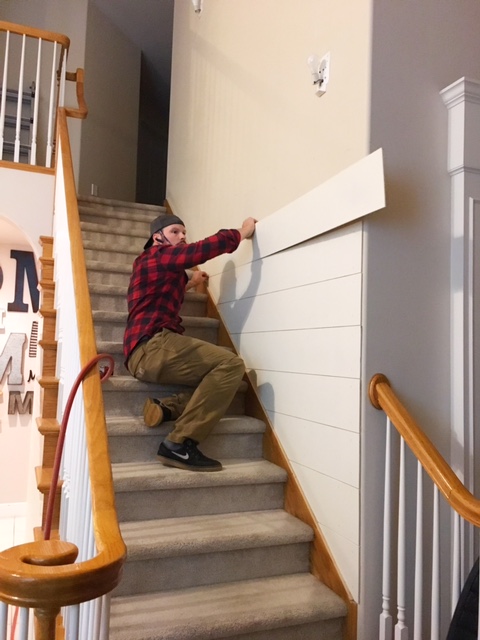
My husband then used a miter saw to cut the boards, and we then attached them using the nail gun on the lines we previously drew. 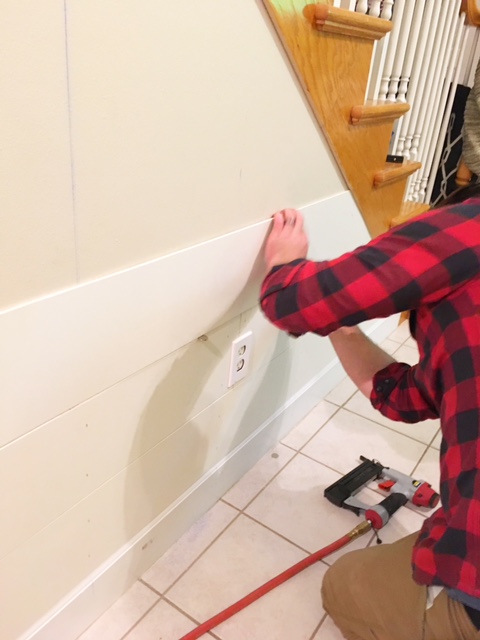
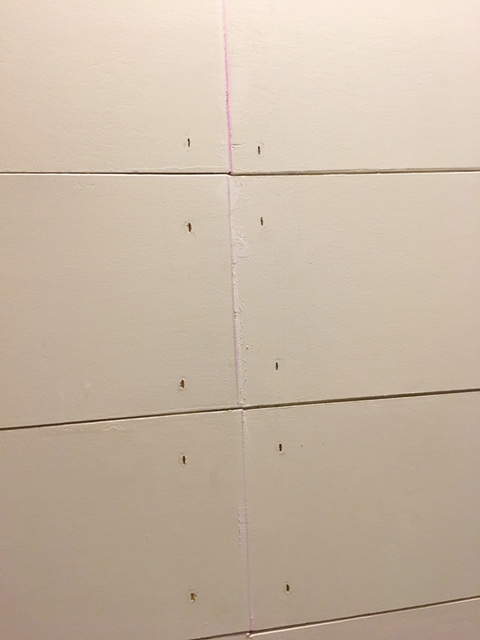
To evenly space the boards, we used nickels! This made sure the boards stayed consistent throughout.

Each board got two nails, aligning with each of the previously drawn lines.
Going around the outlet and light fixtures required a few more steps. Definitely measure twice, and cut once! And my husband used a jigsaw to do this.
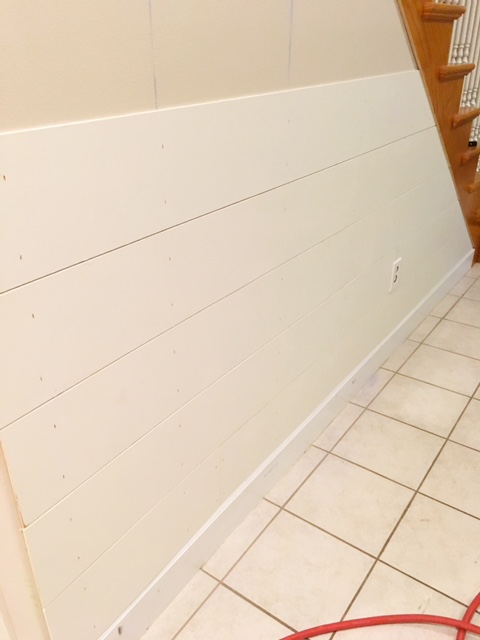
Once all of the boards were on, we attached the trim piece, again using the nail gun.
And that gave it a much cleaner look!

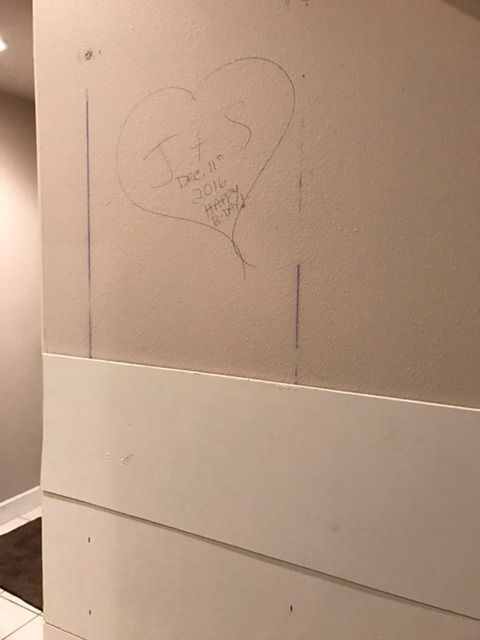
While I wasn’t looking, my husband drew this on the wall before attaching a couple of boards to cover it up. Since this project was a birthday gift, we will always remember it by knowing this is hidden beneath. Totally swooning! He didn’t show me until we were done. And how cool for someone to potentially find some day?
And this portion, complete!
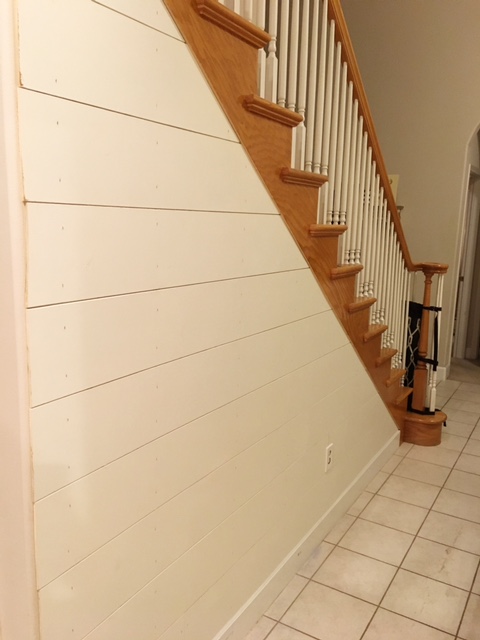
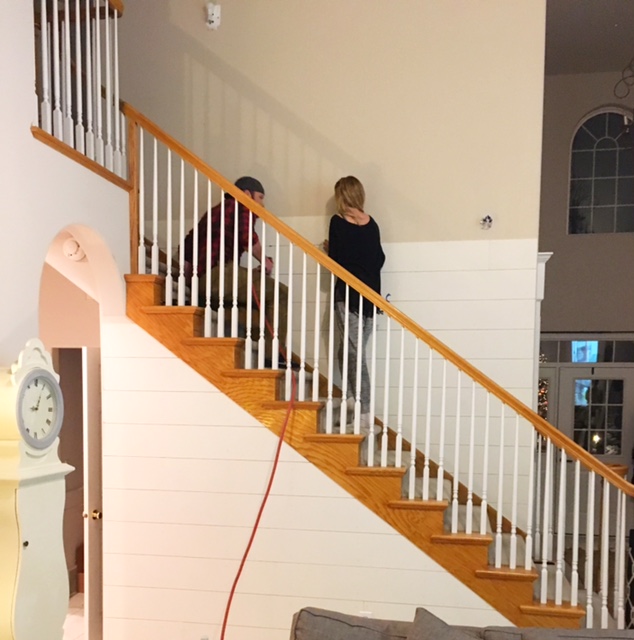
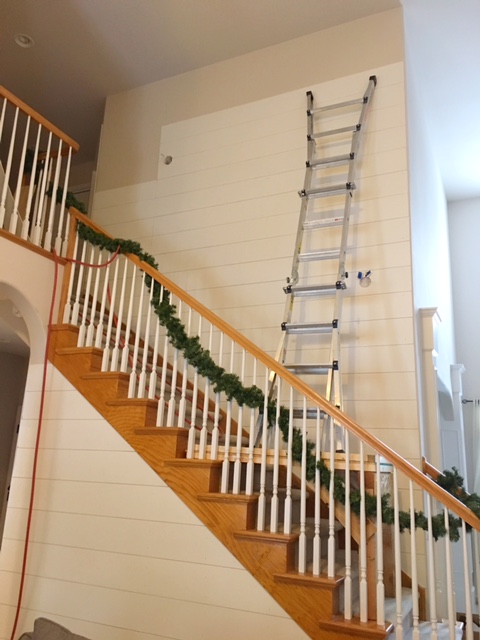
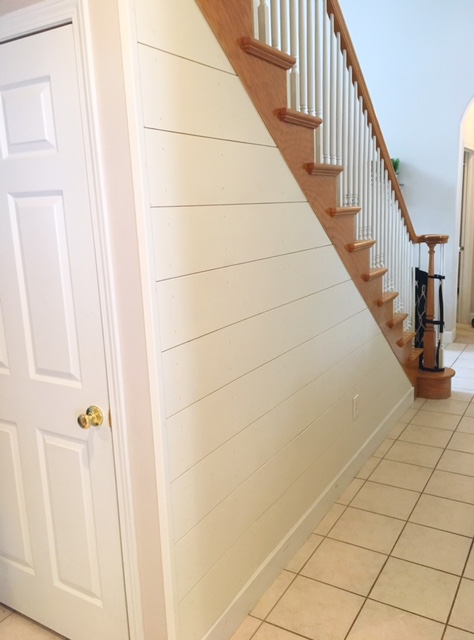
Now on to the top portion. Crazy how different angles and lighting can make the boards look so different. Anyway, we attached the top boards just like the bottom.
TIP: And here is where it might save you some work! We didn’t really have a plan as to how the boards would go up in terms of placement on the top portion. Since the boards weren’t long enough to go all the way across as they were on the bottom portion, they had to be pieced together. So, that is what we did.
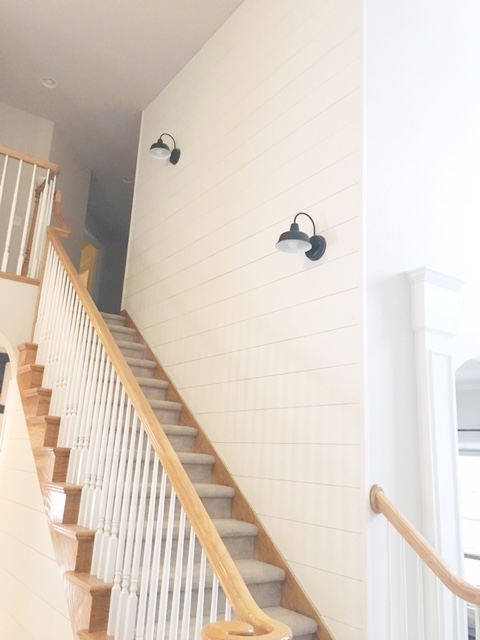
And it was about at this point that we decided we didn’t like it! Because we liked the way the bottom portion of the ship-lapped wall looked, with all of the boards reaching all the way across without being pieced together, we thought it looked strange for the top half of the wall to be pieced together once the boards no longer reached all the way across. You can see the various seams if you look closely in this photo.

So, we took all of the boards from this point up, off, and re-did them so that there was only one solid seam at the top of the staircase. Save yourself the work! Plan ahead 🙂
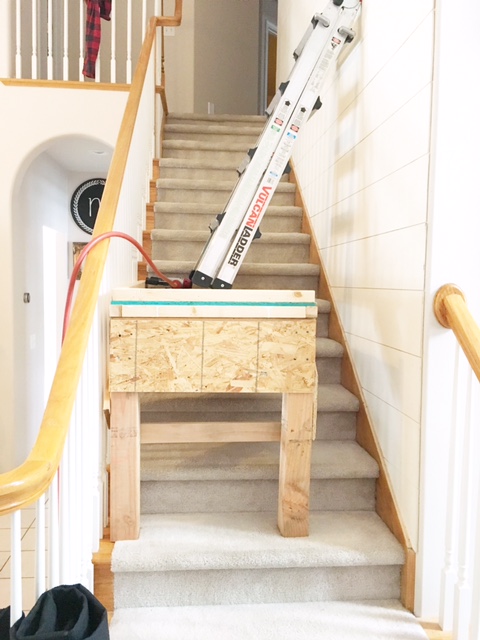
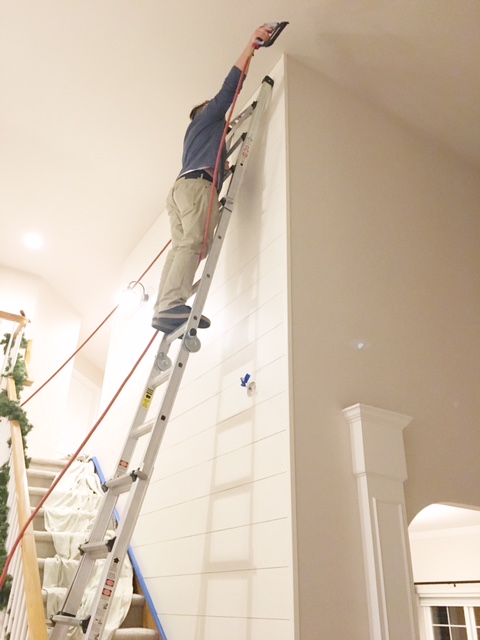
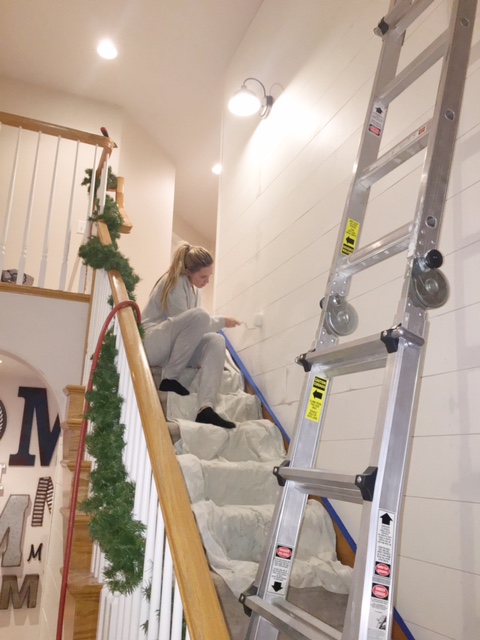
Because the wall is so high, my husband built this platform out of scrap wood we had in our garage so that his ladder would be able to safely reach the top of the wall.
And in this picture, you can see where our new seam is.
Now, I was NOT getting on that ladder, so this was ALL my husband, but he did weave the cord around the ladder, giving himself an anchor, which made me breathe a little easier when he was up there.
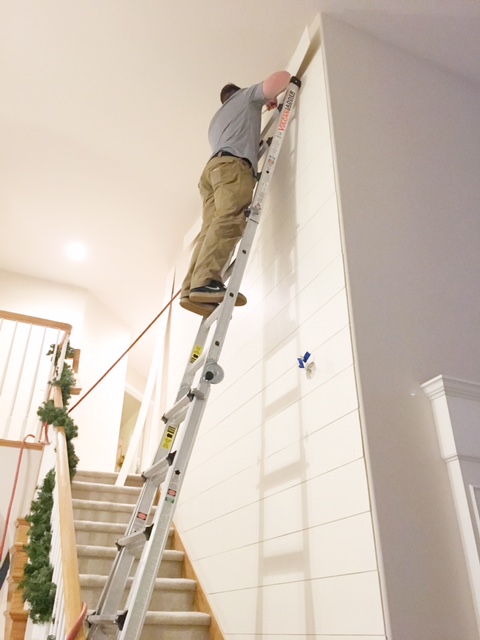
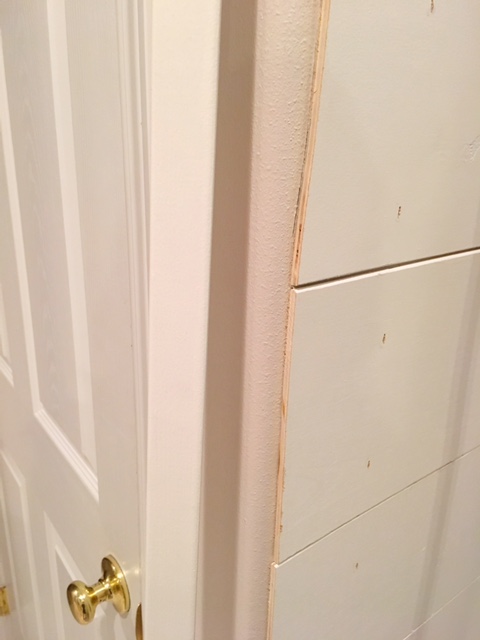
And finally, putting the trim on the edge with the nail gun.
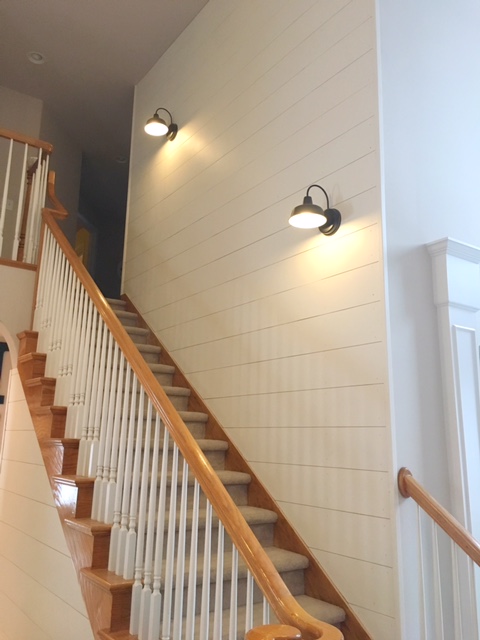
Once all of the boards were up, we then used some spackle to fill in the seams. Once dry, we sanded it down, and then painted over the line.
TIP! Make sure you do the spackling well! I initially just slapped it up there, sanded it down to what I thought was “good enough” and then painted over it. It looked bad! And ultimately had to be redone.
But, once done, I was in LOVE! We added some new fixtures and it was everything I had hoped for.

TIP!! Use some heavier duty spackle when/if filling in any lines or holes, as what we used the first time fell out! And that line was back… Really, the line didn’t look bad. But I just had it in my mind that I needed to cover it up.
So, this time I filled it in with some heavier spackle.
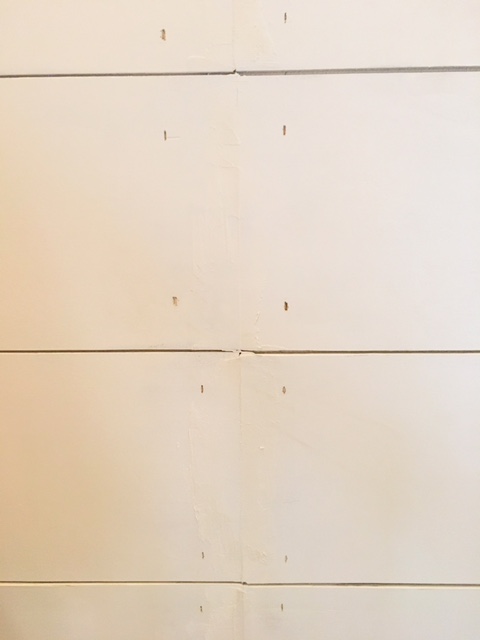
Used the sander to sand it down…

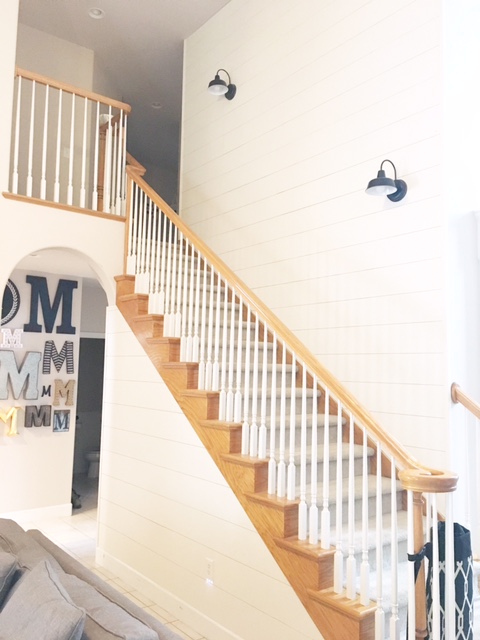
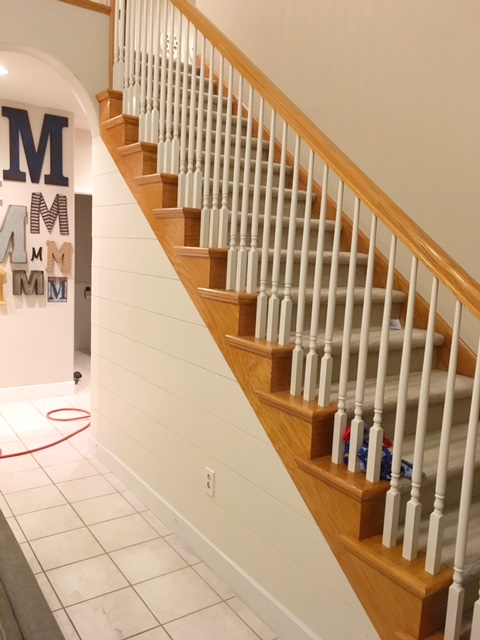
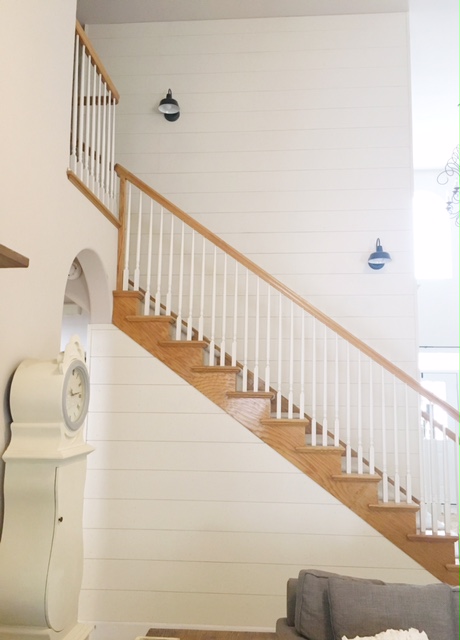
And then re-painted, and finally, the wall was complete and is probably one of my favorite elements of the entire house!
After!
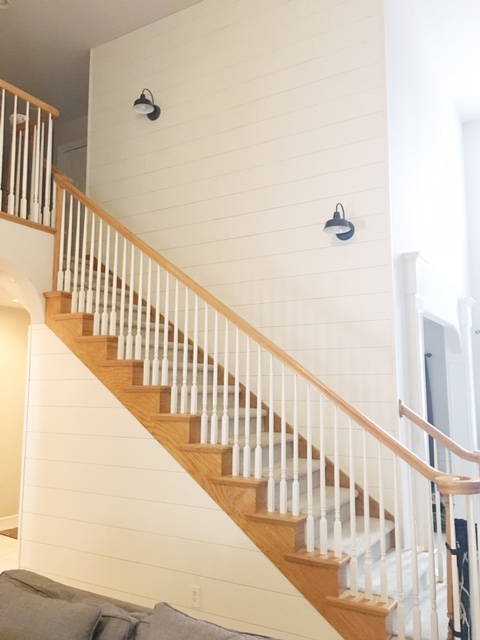
It really brightens our room immensely and gives off a nice texture.
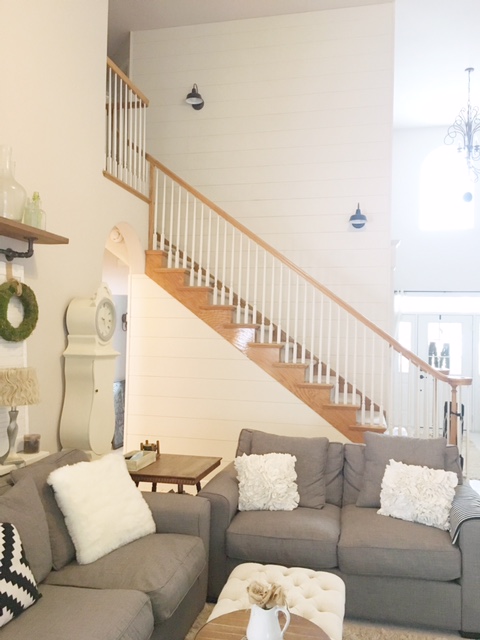
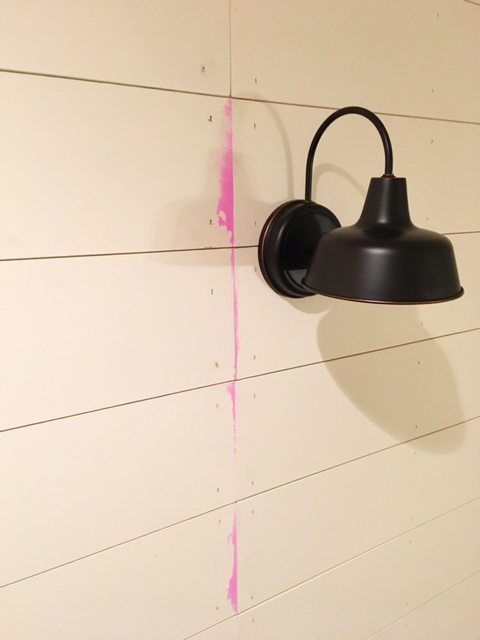
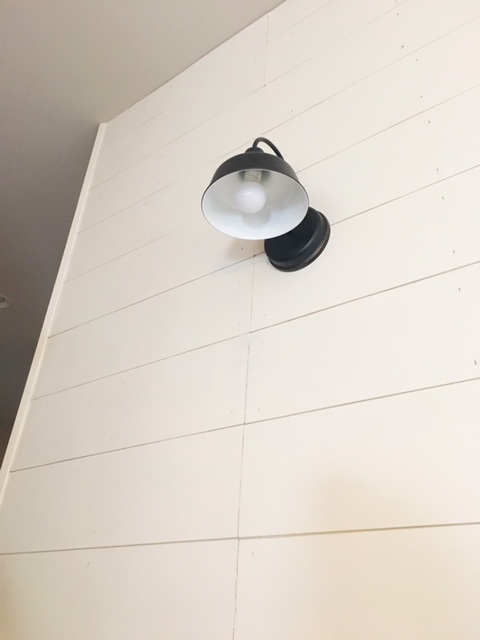
And, the lights! Oh, I love the lights. I got them from HERE for a great price, and I love the contrast they give against the white walls.
TIP! We had a hard time finding lighting that looked just right in these fixtures. Regular bulbs were either too bright or yellow, and the Edison bulbs looked too orange. We ended up investing a little more and got THESE bulbs, which you can custom create their brightness, and once we did this they were PERFECT and just what I was looking for.
Pictures with overhead lights turned on and fixtures turned off, and vice-versa, as well as some before and afters:
I hope this has helped those of you who are considering doing this to your own home. I highly recommend it and it didn’t cost us much at all! If you have any questions, don’t hesitate to ask!


Oh! I love this tutorial!
Thank you so much!
It looks amazing! Thanks for sharing how you did it!
I appreciate your kind words! Thank you!
What did you use as your end trim pieces?? Was it just a straight piece of trim like a 1×4 butted up again the ends of the shiplap or did it cover the ends like a corner piece. Looks great and will be doing soon. Thank you for your reply in advance.
That looks incredible and what an amazing tutorial you did here. The idea of this freaks me out but with these tips at least I see how it is done.
Gosh you are sweet! Thank you!!! YOu can SO do this!!! Ask me any questions you may have!
Beautiful! But what I love the best is the hidden message. So sweet!!
Thank you for sharing with us at #MMBH, pinned this to our board. 🙂
XO
Awwww haha that was such a nice surprise!
Such a great DIY! I love how it turned out!
Belle | One Awesome Momma
Thank you so very much!
A really nice DIY post. Love this.
Thaj you, Sue! I appreciate that!
This is AMAZING! I LOVE shiplap (and Joanna Gaines). <3
Hahaha I do, too! Thank you!
Wow, it gave your home a completely different look- I love it! It gives it so much character!
I agree! And thank you so much! It really brightened it up!
Love the tutorial. We have the same BFF! 🙂 I want shiplap in my bedroom. It might happen now.
Hahaha DO IT! I LOVE it!!
It looks amazing! I love Joanna Gaines style! And OMG totally swooning over your hubby’s surprise!
Xo,
Alexandra Christine Blog
http://www.alexandrachristineblog.com
Hahaha I was, too! Thank you so very much!
That turned out SO good! Look at you, a regular Joanna Gaines. 😉
Thank you!! Haha I WISH! 😉
you make it very simple to understand. my summer project for the laundry!
wish me luck. and thank you!
GOOD LUCK!! Show me when you’re done; I’d love to see!
Hi Shannon!
What kind of spackle did you end up using? We are doing this in my nursery and I’m filling in the holes and line this weekend!
So sorry I didn’t see this sooner, Alyssa! Thanks for reaching out on FB! Glad we connected 🙂
I also used underlayment to make my shiplap for my kitchen wall and hallway (I did it halfway up the wall and topped it with chair rail). I love the look of the shiplap going up the stairs. I could do that for my basement stairwell that way it would tie in the basement and the upstairs together. Thanks for the idea.
Oh you are so very welcome! Glad you like it and please, show me when you’re done!
Just wondering if you also puttied the nail holes? It looks great!
beautifully done. You are so lucky to have your husband help you. And you sound like you
give him lots of support. Kids are cute helping.
Did you fill in and paint over the nails too? Or are they not visible?
Thanks for the tutorial and all the tips. I’m thinking of doing this on the back of my kitchen island, and having read this, I think I can do it quite easily since there are no crazy angles. Love that you mentioned in this post that someday someone might see the little love note your husband left you, and yesterday, in your stories you showed it to us :).
And while I’m here…PLEASE FINISH YOUR LOVE STORY POST!!! You left us hanging!!!
The shiplap looks great a lot of work on the top of staircase . Our project is only the lower half of a bathroom. But thanks for all your advice. We will look at the under laymen’s that you suggested rather than a quarter inch plywood .Again Thank you so much .
Good job! Great directions and photos 😊
Is it possible to keep a rounded drywall corner with shiplap? I am ending my shiplap where 4 other rounded drywall corners are. I have to figure out a way to keep the rounded corner.
What is underlayment? I looked on Home Depot and can’t find anything like it.