
I’ve rounded up my favorite Halloween DIYs and below are all the directions and links!
Spooky Boards
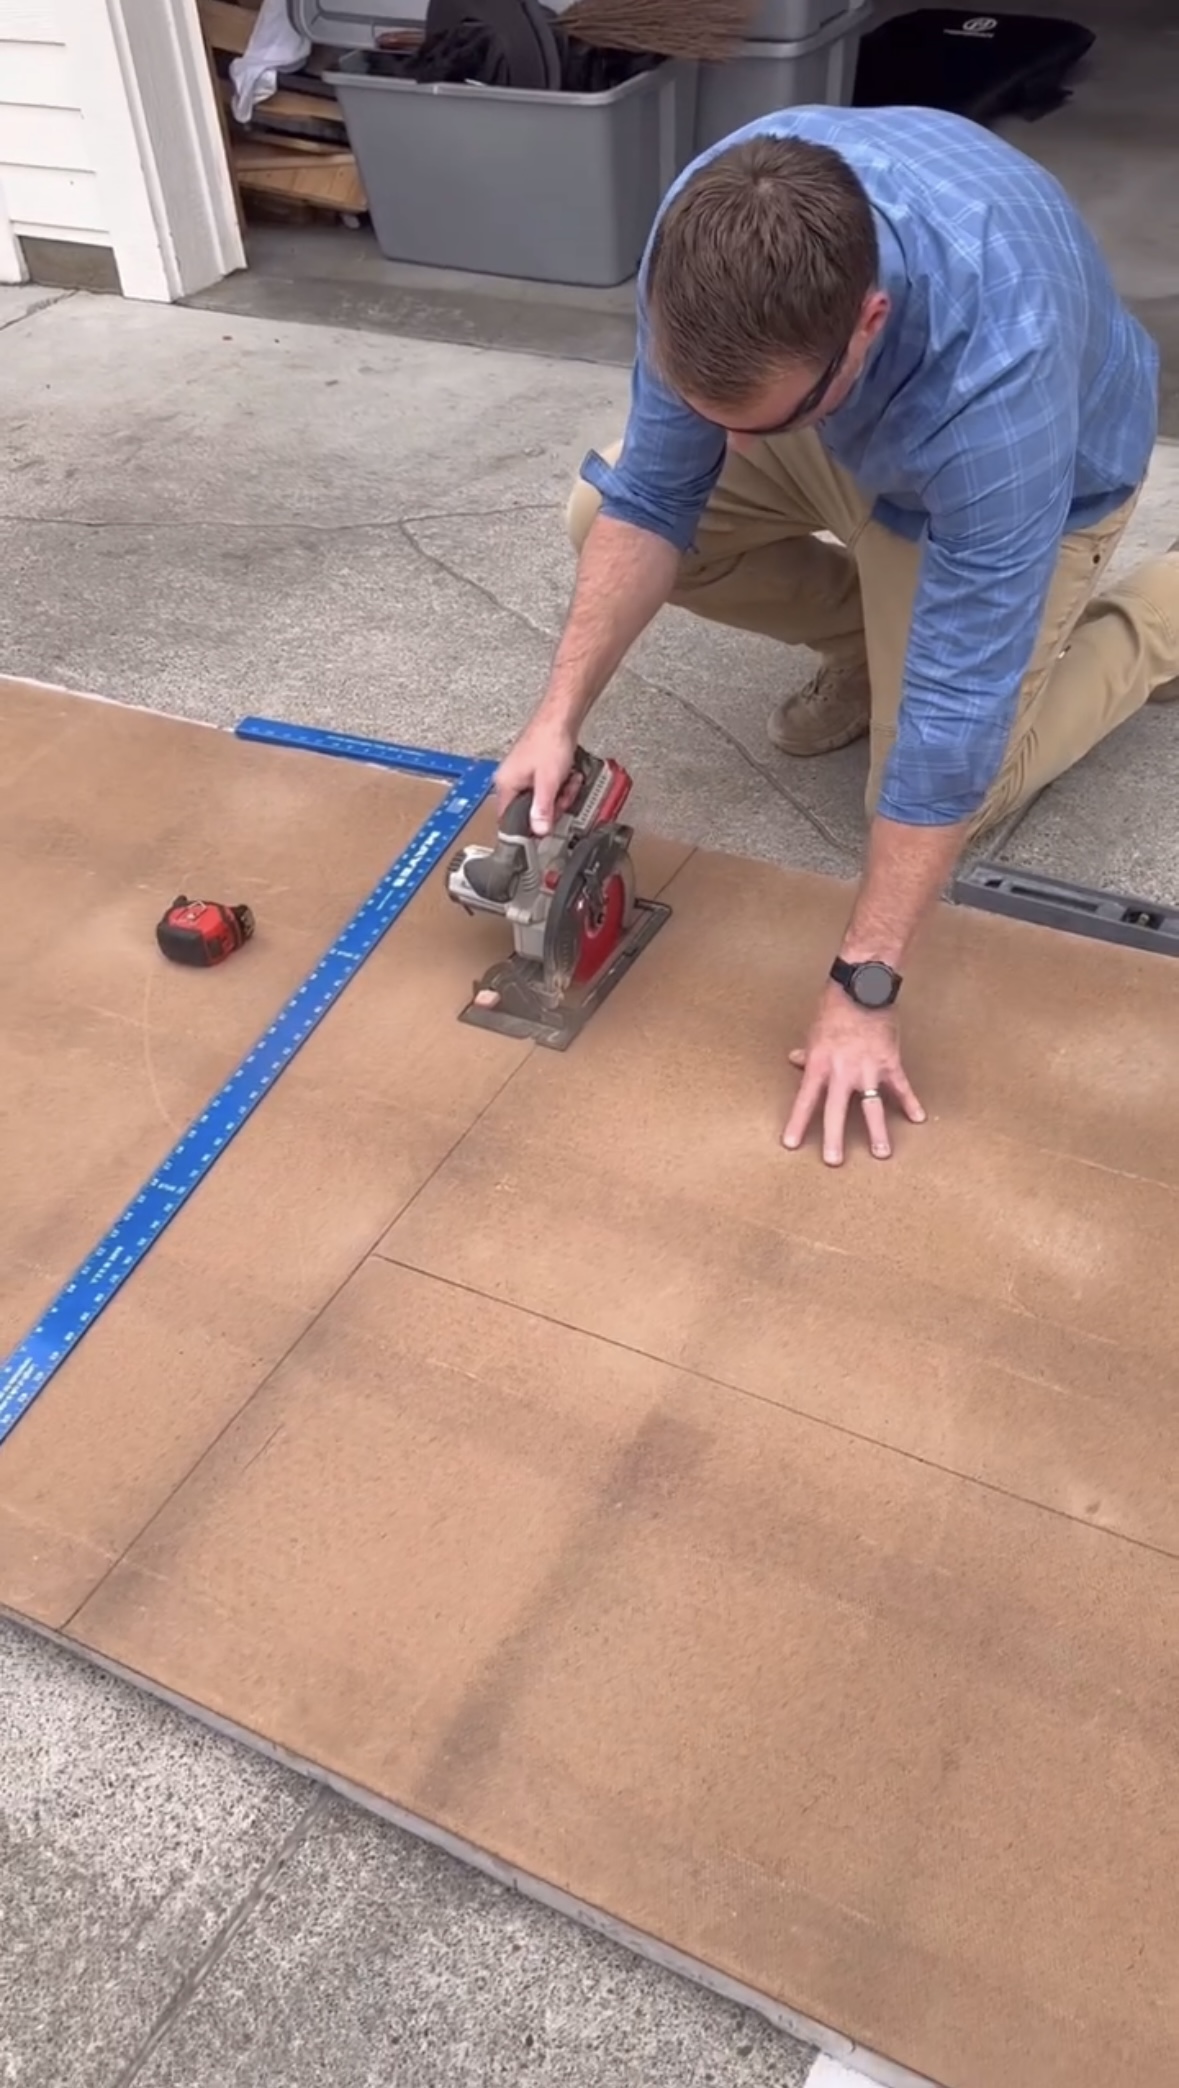
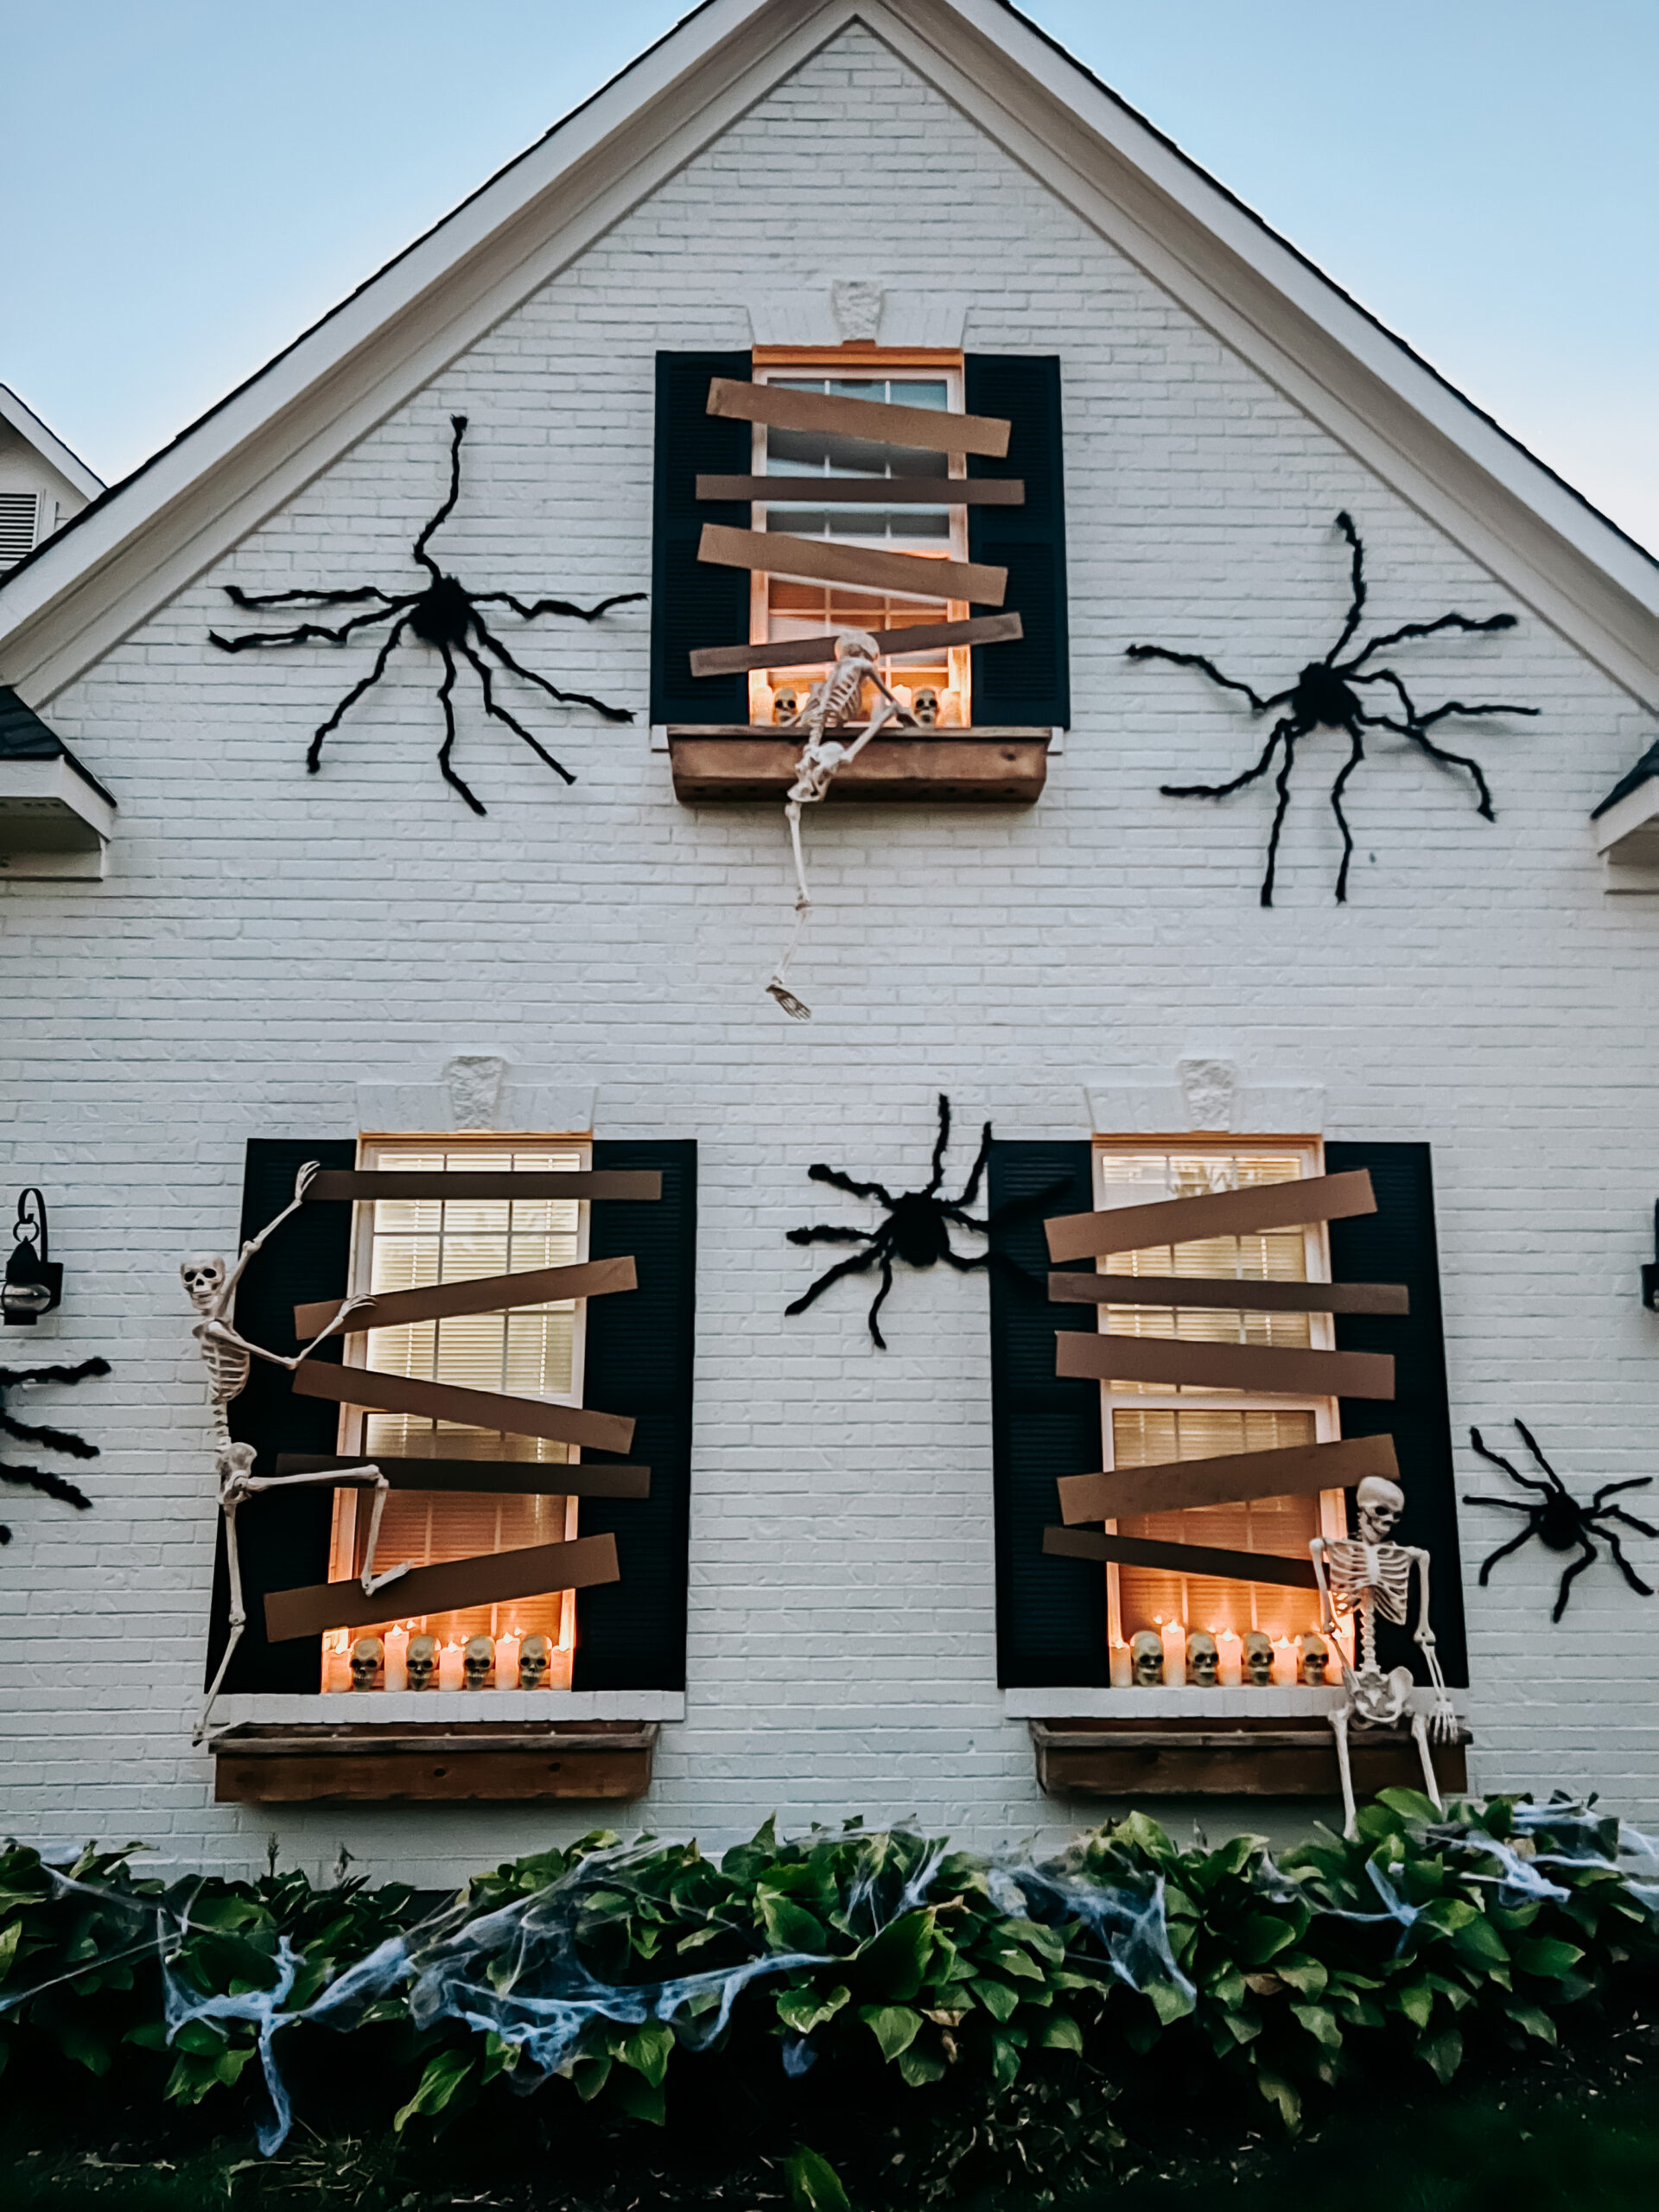
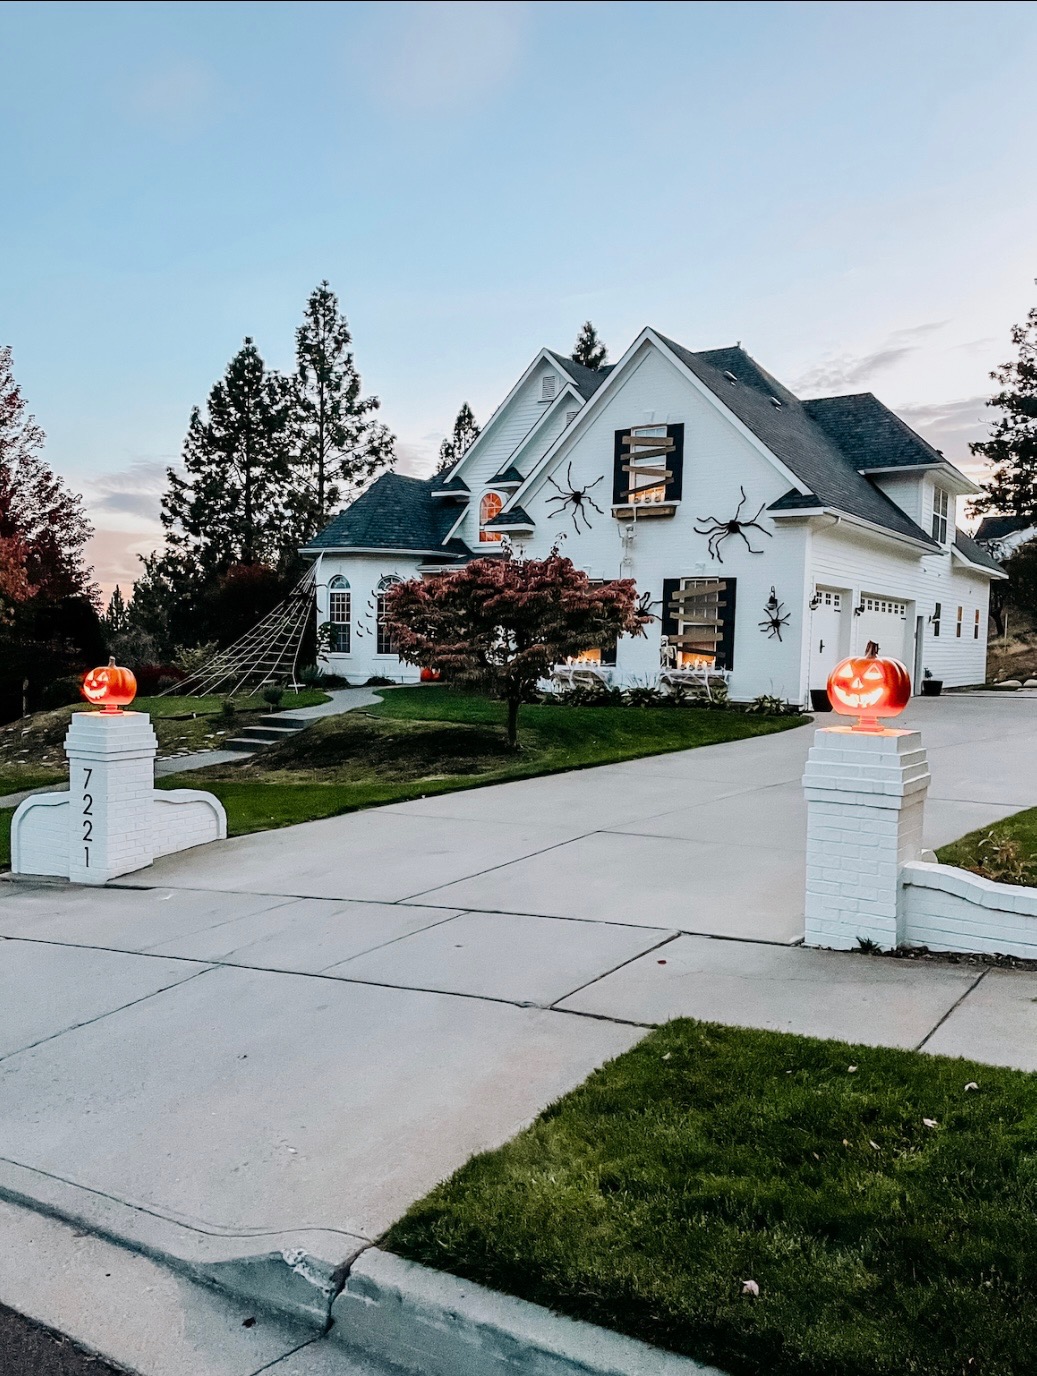
These spooky boards give your home the perfect haunted house vibe with minimal effort. The best part? You can make them for under $20!
To start, we grabbed one sheet of plywood and cut it into 5″, 6″, and 7″ strips, then trimmed those to 45″ and 48″ long. (Scroll down for the exact quantities we used!)
We wiped down the shutters first, then attached each board using two large Velcro Command Strips — the kind that hold 20-lb pictures. We’ve used smaller ones before and they work too, but the heavy-duty version gives a little more peace of mind.
For the hanging spiders, we used shower Command Strips, just the actual strip, not the plastic hook, pressed right onto the spider’s belly. They’re the blue waterproof kind. We used 2 strips for the smaller spiders and 3 strips for the bigger ones.
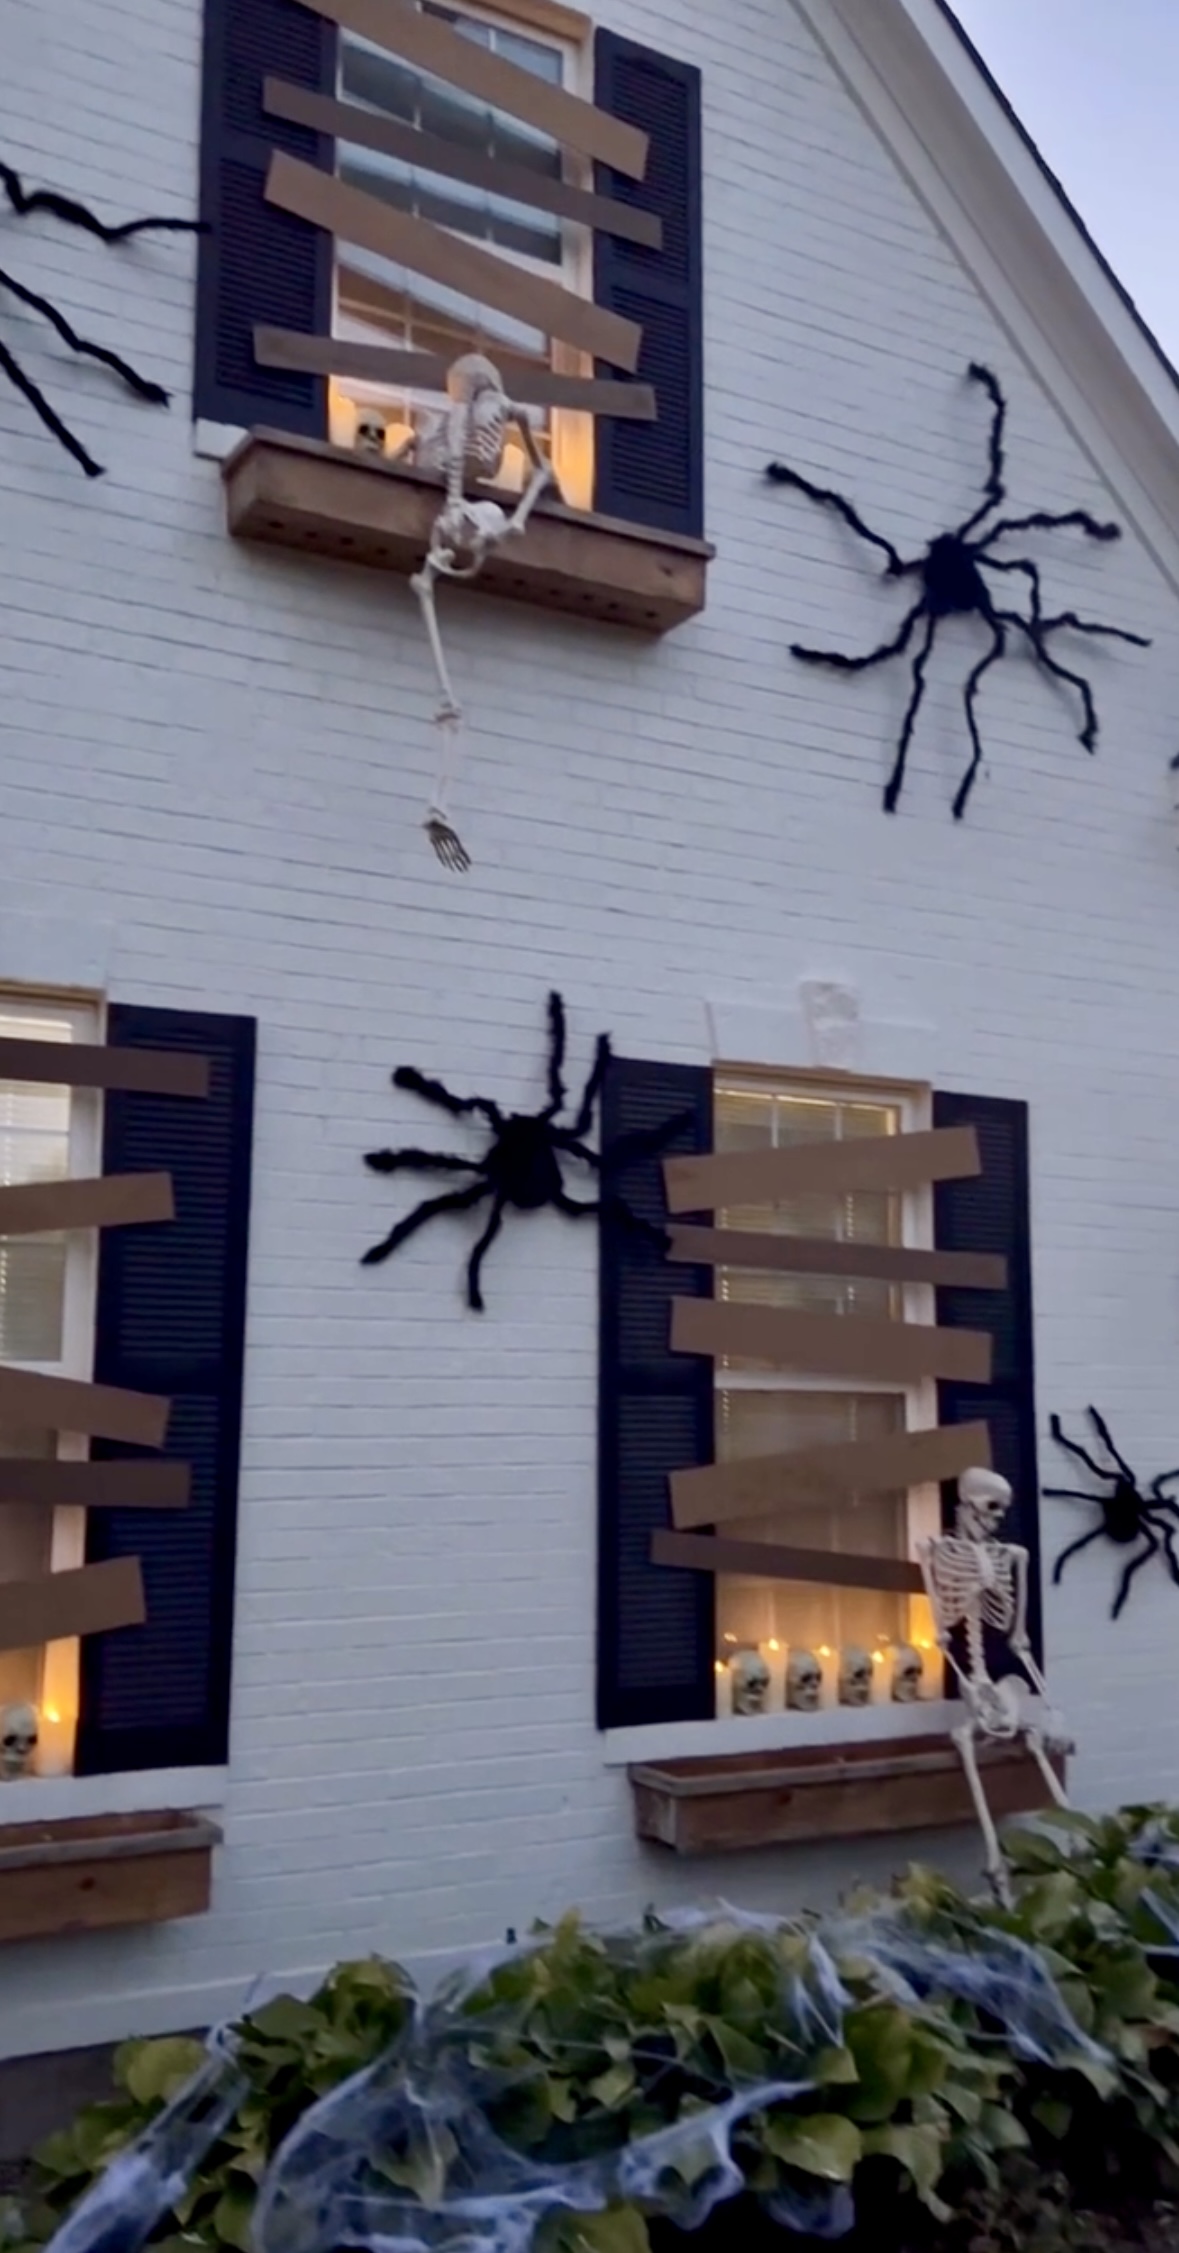
And that’s it! Super easy setup that gives a huge impact. We’ve been doing this same display with battery-operated, remote-controlled candles for about three years now, and it’s become a neighborhood favorite.
Pro Tips
-
Look for marked-down plywood! We grabbed a damaged board that was 30% off — only $11 total!
-
Alternate board sides when hanging. Some show the darker grain, others the lighter side — it gives the display a nice color variation and rustic feel.
Our Cut List
-
6 boards — 5″ x 48″ (darker side showing)
-
4 boards — 6″ x 45″ (lighter side showing)
-
4 boards — 7″ x 45″ (lighter side showing)
Our top window is smaller, so it only fits 4 boards, while the bottom windows have 5 each.
Everything is linked below!
6.5′ spiders | 4 pack of spiders | Command Strips | Spider web (includes a spider) | Skeletons | Witches hats |Black bats | Candles | Spider Web
Witch Crashing Into a Tree aka Treena
I just LOVE how playful and fun this witch crashing into a tree turned out! I found a great tutorial on eHow (thank you, Matthew Ashman!) and used it as a guide. Below is exactly how I put mine together so you can make one too!
Materials
-
Witch hat – already had
-
Hair – Amazon
-
Cape – thrift store
-
Pool noodles – dollar store
-
1×2″ wood trim – already had
-
Black gloves – grocery store
-
Witch fingers – Party City
-
Socks – thrift store
-
Shoes – thrift store
-
Broom – Trader Joes
Directions
-
Start by cutting your wood trim into two 16″ pieces (arms) and two 22″ pieces (legs). Pre-drill two holes near the ends of each piece to make attaching easier later.
-
Cut the pool noodles down to match the wood lengths. Then, cut a slit all the way up each noodle and slide the wooden pieces inside. Wrap a little tape around each one to keep everything snug and secure.
-
I screwed in the arms first, then did a little “tree hug” to figure out where the legs should go. Each arm only needed one screw, but the legs took two to hold the weight of the boots.
-
Slide on the socks, gloves, fingers, and shoes. I used a staple gun to attach the cape — one staple at the neck, one at the top of each arm to keep the sleeves in place, and one more on each leg to cover the wood.
-
Pop on the hair and witch hat, and she’s ready to make a crash landing!
Everything is linked below!

Purple Wig | Witch Hat | Cape | Witches Fingers | Striped Socks | Broom
Jack-O’-Lantern Lights
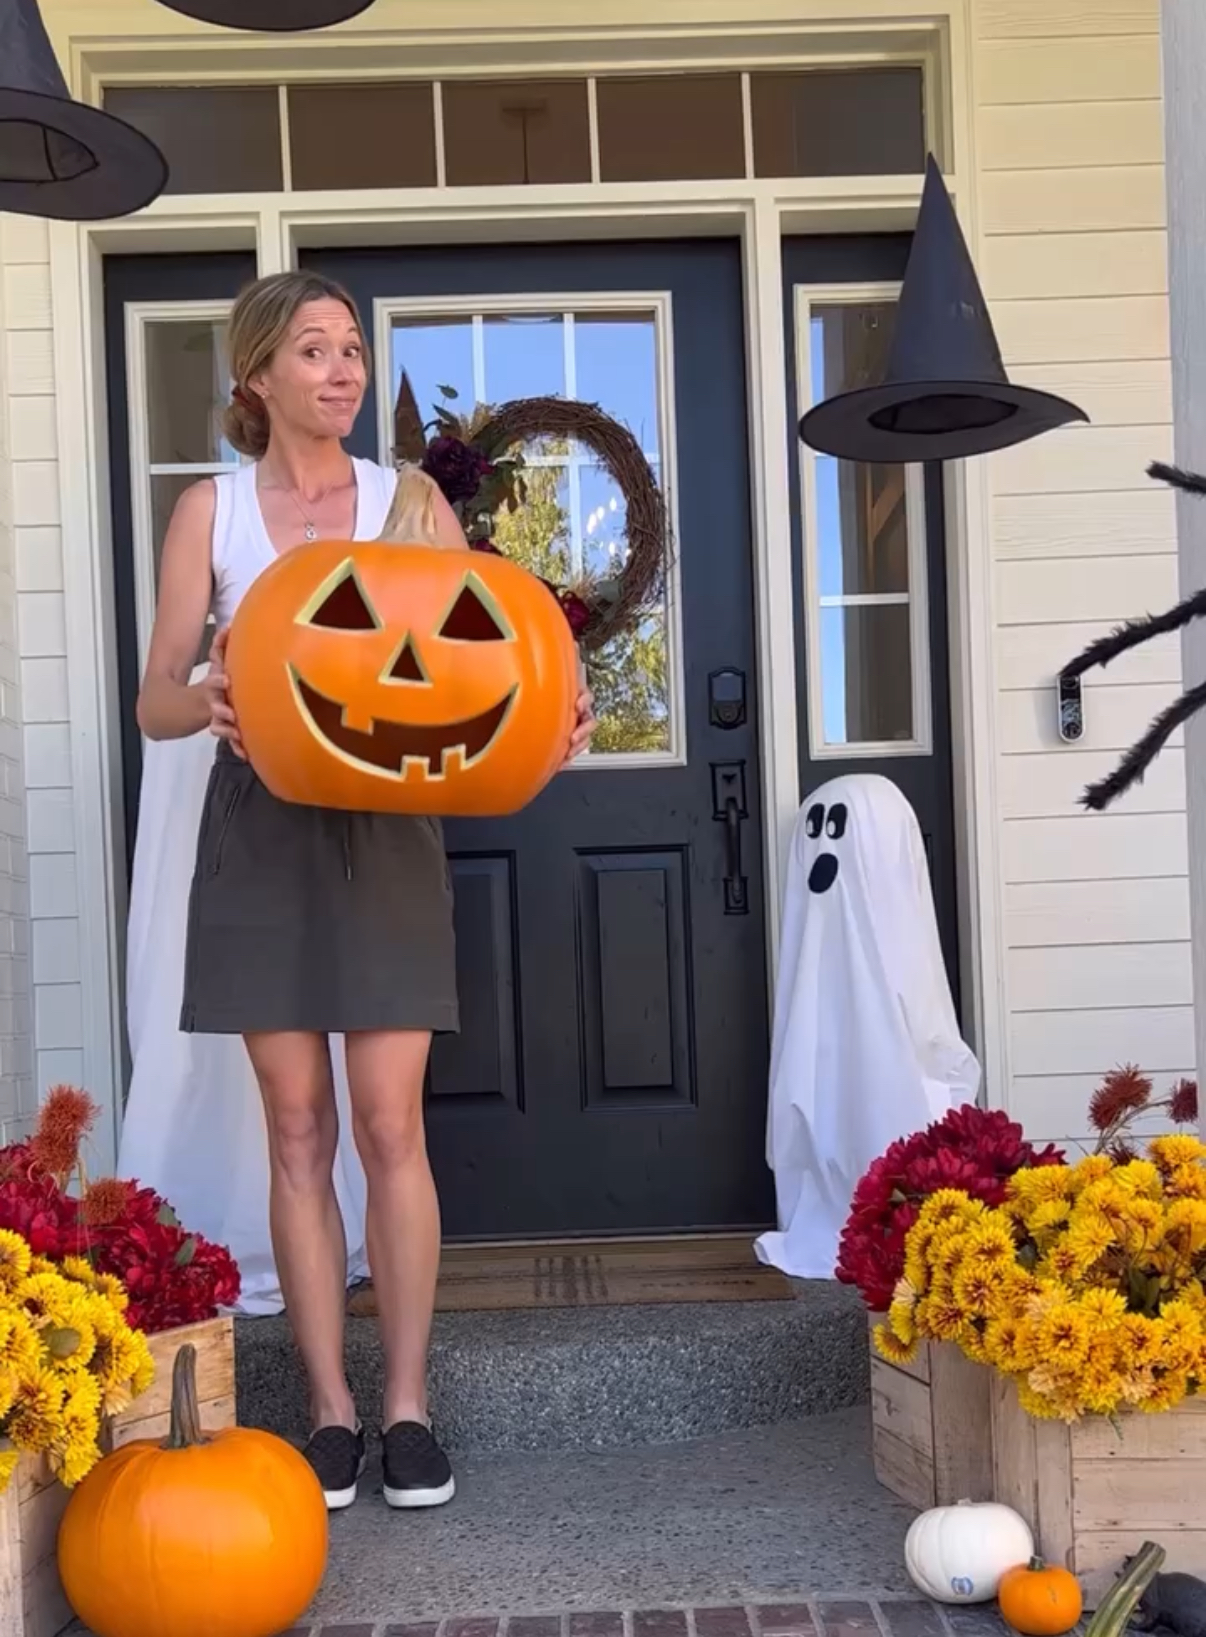
This might be one of the easiest Halloween projects I’ve ever done, and it makes such a big statement!
All you need are a few large plastic jack-o’-lanterns (the hollow kind you find at craft or big box stores.) Using a utility knife, cut out the bottoms of each pumpkin so they can easily fit over your outdoor lights.
Once the bottoms are open, simply place them right over your landscape or pathway lights
Pumpkins are linked below!
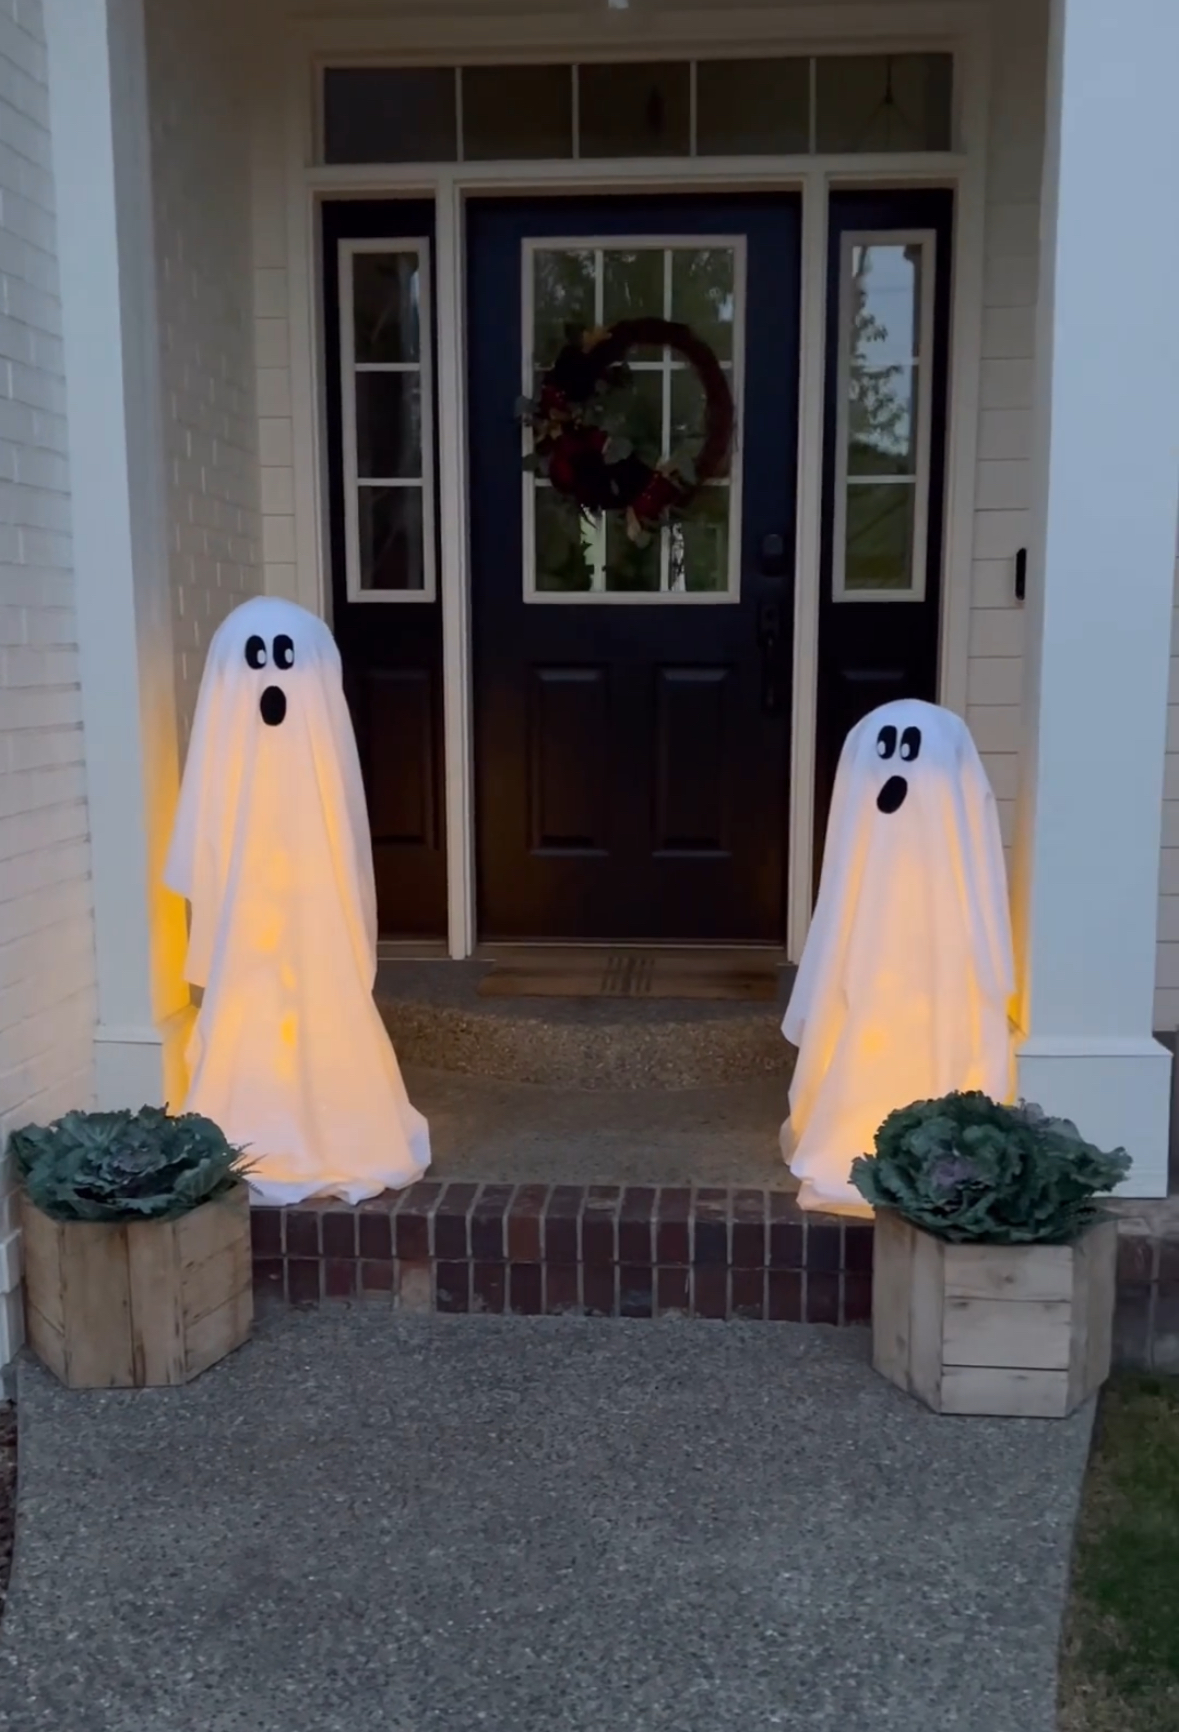
Light Up Ghosts
These Light Up Ghosts were such a fun and easy Halloween DIY — seriously, one of the simplest projects I’ve done (minus the ironing, of course.) I saw several versions floating around Pinterest and ended up combining a few ideas to make our own. They turned out so cute and took almost no time to put together!
Materials
-
2 tomato cages (I grabbed mine from Lowe’s)
-
2 eight-inch foam balls
-
1 white twin sheet (cut in half)
-
Battery-operated string lights (with a timer if you can find them!)
-
Zip ties
-
Safety pins
-
Black felt (plus white felt or paper for the pupils)
Directions
-
Attach the foam balls to the tops of your tomato cages — one per ghost. You can use a little hot glue or just wedge them in snugly so they don’t move around.
-
Wrap your tomato cages with battery-operated lights. I love using the kind with a built-in timer so they turn on automatically each evening! Use a few zip ties to keep the lights in place.
-
Cut your twin sheet in half and give it a quick iron (trust me, it makes a difference!). Drape one half over each ghost and safety pin the sheet in the back to help it stay put.
-
Cut out eyes and mouths from black felt, and small white circles (or paper) for the pupils. Use a hot glue gun to attach them to your ghost’s “face.”
-
If it’s breezy where you live, place a couple of heavy rocks around the base and tuck the sheet under them. That keeps everything from blowing away.
Everything is linked below!

Tomato Cages | Foam Balls | White Twin Sheet | String Lights
Floating Candelabras
These floating candelabras are the perfect finishing touch to our haunted house setup and have quickly become one of my all-time favorite decorations! They add just the right mix of spooky and elegant, especially when they start “floating” in the dark.
Thank you to @thecoastaloak for the inspiration!
Directions
I found everything I needed on Amazon, and putting these together couldn’t have been easier. The candelabras are super lightweight, which makes them perfect for hanging. I used extra-strong fishing line to suspend them from the ceiling, it’s nearly invisible, so they really do look like they’re floating!
I also found remote-controlled candles that fit perfectly into each holder. They don’t slip out, and I can turn them all on with one click (which is a lifesaver when you’re setting up last-minute before guests arrive.)
One of my favorite parts? These candelabras aren’t just for Halloween! They look gorgeous during the holidays too, and they easily break down for compact storage when the season’s over.
Everything is linked below!

Candelabras | Candles | Fishing Line
As always, thanks for stopping by!
<3 Shannon


Your house looks spooky amazing 🎃👻🕷️🕸️thanks for sharing. The candleabras are a perfect touch ❤️ i love it all.