


I also picked up some baling wire to attach the ends together.

My husband cut the two pieces of wood into thirds so that I had my five equal pieces, with one leftover.
We then placed the pieces in a star shape…

and then made sure it was level.

We then drilled holes into the five points, inserted the baling wire and twisted the ends together, trimming off the extra.


The following pictures show how the star can be maneuvered to find the perfect shape.


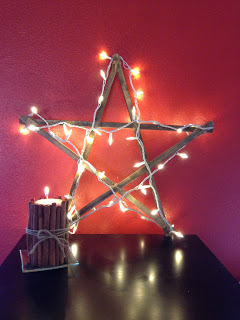
And this is where we landed.

We then tied the middle crevices with twine so that the star could no longer move.

We then went over the baling wire with the twine.

And then I got cold and went inside to make us coffee, leaving The Hubby to finish it up. Tee hee.

I bought these Christmas lights, which have a nice, soft glow with white wiring.

And loosely wrapped my star.
Ta-da! Our whole family loves it and it really brightens the room!


This would make a fun gift for my mother in law on her birthday next week!! It looks like something I could do by myself fairly easily too! Thanks for the great tutorial!
You’re welcome, Jacque! It didn’t take much time at all and we receive compliments on it throughout the holiday! She’ll love it!