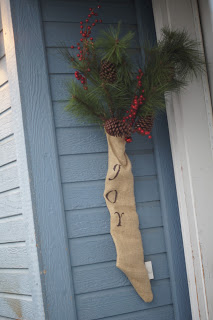
Materials:
Tissue paper
Scissors
Sewing pins
Burlap (Joanne’s)
Sewing machine and thread
Stencils (I found mine at Walmart)
Paint in color of choice (Walmart- I used black)
Paint brush
Bell
Filler-(Michaels-I used greenery with pine cones and red berries)
Directions:
1. On a piece of tissue paper, draw your stocking. I know that sounds a little blunt, but I just went for it! I aimed for long and skinny, but you can make yours however you would like. Make it a little wider than you would like, as once you sew it together you will lose about a half-inch around the edges. Then, cut it out.
2. Next, fold the burlap in half, and on the fold place the straight edge of your tissue paper stocking on top of the burlap and pin. Then, cut around the tissue paper to cut out your burlap stocking.
3. Using your sewing machine, stitch it up. Flip the stocking inside out so that your stitching is now on the inside.
4. Cut out about an six inch by one inch (appx.) piece of burlap and fold in half, lengthwise, and sew together. Then, place the two ends on top of one another so that you have a loop, and sew together. Finally, sew the loop to the back of the stocking so that it can now hang.
5. Tape your stencils in the word of your choice to your stocking, making sure to evenly space them. Then, paint and remove the stencil soon afterward. Let dry.
6. (Optional) Then sew on a little bell toward the top.
Linking up with Tatertots and Jello!


Only registered users can comment.