

Gwyn was recently given the opportunity to learn how to make sourdough bread from a neighbor and she absolutely loved the whole process. Our sweet neighbor also sent us home not only with dehydrated starter, but with all of the instructions (and tips!) which we have shared below. This bread was so incredibly delicious and we will absolutely be giving this a try at home!
Rehydrating your starter:
• Place 2 tablespoons of dehydrated starter and 2 tablespoons of lukewarm water warm filtered water into glass jar.
• Mix.
• Let sit for several hours to allow starter to dissolve. Stirring occasionally to help break up the chunks.
• It should start to look like pancake batter.
• Place 1/4 cup flour into jar with 1/8 cup lukewarm water warm water, mix well. It should be a thick pancake batter consistency. Slowly add a little bit of water as needed to get the thick pancake consistency. This is its first feeding.
• 24 hours later discard half the starter and feed again with the same measurements as above.
• Repeat the same process the next day. After this feeding it should be active, bubbly and doubled in size and ready to make bread.
First off you need to name your starter. This is a thing, they become part of the family 🤣. Mine is Bready White, I call her B for short.
After rehydrating your starter you can maintain it a couple different ways.
First: you feed it everyday. I do mine before bed.
You discard half (always in the trash, never in your sink it will clog your drains…it hardens like cement)
Add equal parts flour and water.
What I do every night is discard all but about 2 tablespoons of starter and add 1/4 cup flour and 1/8ish cup water. You want your starter to be a thick pancake consistency with NO lumps.
Scrape down the sides of your jar and place lid on top.
You can do a regular feeding and place in the fridge for months (if you choose this method it’s best to feed it once a week) you may notice this greyish liquid on top after a little while of being in the fridge. This doesn’t mean it’s gone bad, that is called hooch and you just mix it back into the starter or you can dump it out, I’ve done both, either way it doesn’t hurt your starter.
Now if you maintain your starter this way you’ll want to pull it out at least 2 days and do daily feedings before making bread.
• You always want to use your starter when it is bubbly, active and has at least doubled in size (at peak rise, mine will usually triple in size) which changes with the seasons and temperature of your house. This is why I like feeding mine before bed cause by late morning I’m able to make bread. The colder your house the slower it is to peak rise. The warmer your house the faster.
• Always use Luke warm filtered water
• Organic all purpose flour or bread flour is best. Costcos organic all purpose flour is great (comes in a green and white bag 2 pack) using a flour with a higher protein content is what you want. (Bread flour has a higher protein than all purpose but costcos all purpose has a decent protein percentage).
• When you make bread and it uses most of your starter and you only have a little bit on the sides of your jar don’t worry! Scrape the sides of it down and feed it like normal at the regular feeding time. You’ll be surprised at how little of starter you need when feeding it.
Starters are very hard to “kill” once they are established (which you already got a start to an established starter).
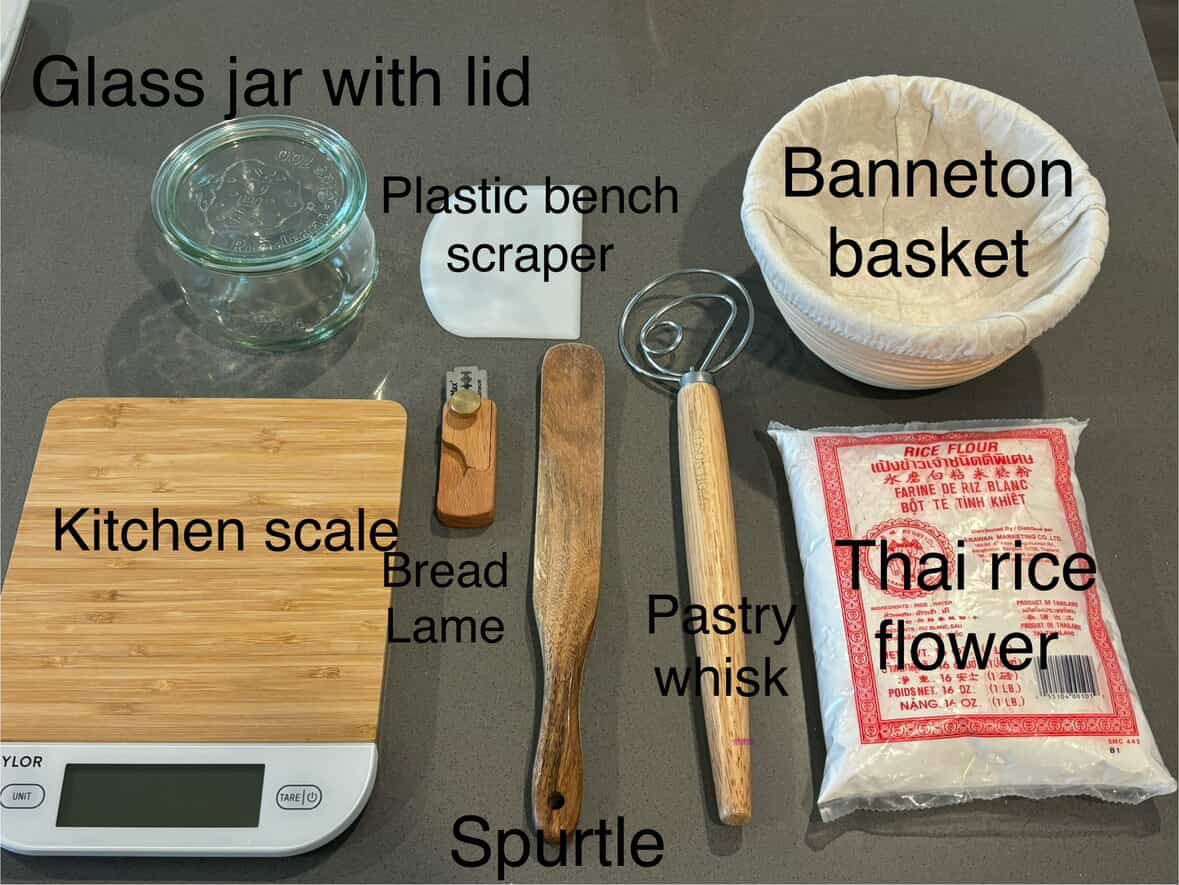
Things needed for sourdough:
• Glass jar with lid. You don’t want to use anything that will screw on or your jar will explode. I like weck jars, they have a glass lid that just sits on top.
• Wood spurtle for mixing
• Pastry whisk (not absolutely necessary but helps a lot)
• Kitchen scale (everything is measured in grams)
• Bread lame (for scoring your designs and making your expansion score)
• Plastic bench scraper (this is so nice to scrape down your bowl, and to scrape it when getting all your dough out)
• Thai rice flower. This won’t absorb into your bread as it is not gluten based.
• Banneton baskets, these are what your bread will rest in while in the fridge. They come in many shapes and sizes.
• Dutch oven. This is the cast iron pot you’ll bake your bread in.
• Plastic bowl covers. Or a reusable bowl cover that has a food safe plastic lining. When your dough is covered you don’t want it drying out.
• Parchment paper
Making bread:
Recipe: (this one is what I use and I’ve done a lot of different measurements and like this the best)
333 grams Luke warm filtered water
100 grams starter
500 grams flour
10 grams salt (I like to use organic fine sea salt)
• Mix water and starter until it’s a milky liquid
• Add flour and salt
• Mix until it is a shaggy consistency and all flour has dissipated
• Scrape the sides of your bowl with bench scraper
• Cover bowl with plastic bowl cover and set aside for 1 hour
• After 1 hour do first set of stretch and folds. You’ll grab one corner of your dough and stretch it up as much as you can without tearing the dough. Turn your bowl a quarter turn and do it again. You will do this 4 times. Cover your bowl and set aside for 30 mins.
• You will do another set of 4 stretch and folds, cover and repeat in 30 minutes.
• You will do a total of 4 sets of stretch and folds every 30 minutes.
Example:
Dough is mixed at 1:00
First set of stretch and folds at 2:00
2nd set of stretch and folds at 2:30
3rd set of stretch and folds at 3:00
4th set of stretch and folds at 3:30
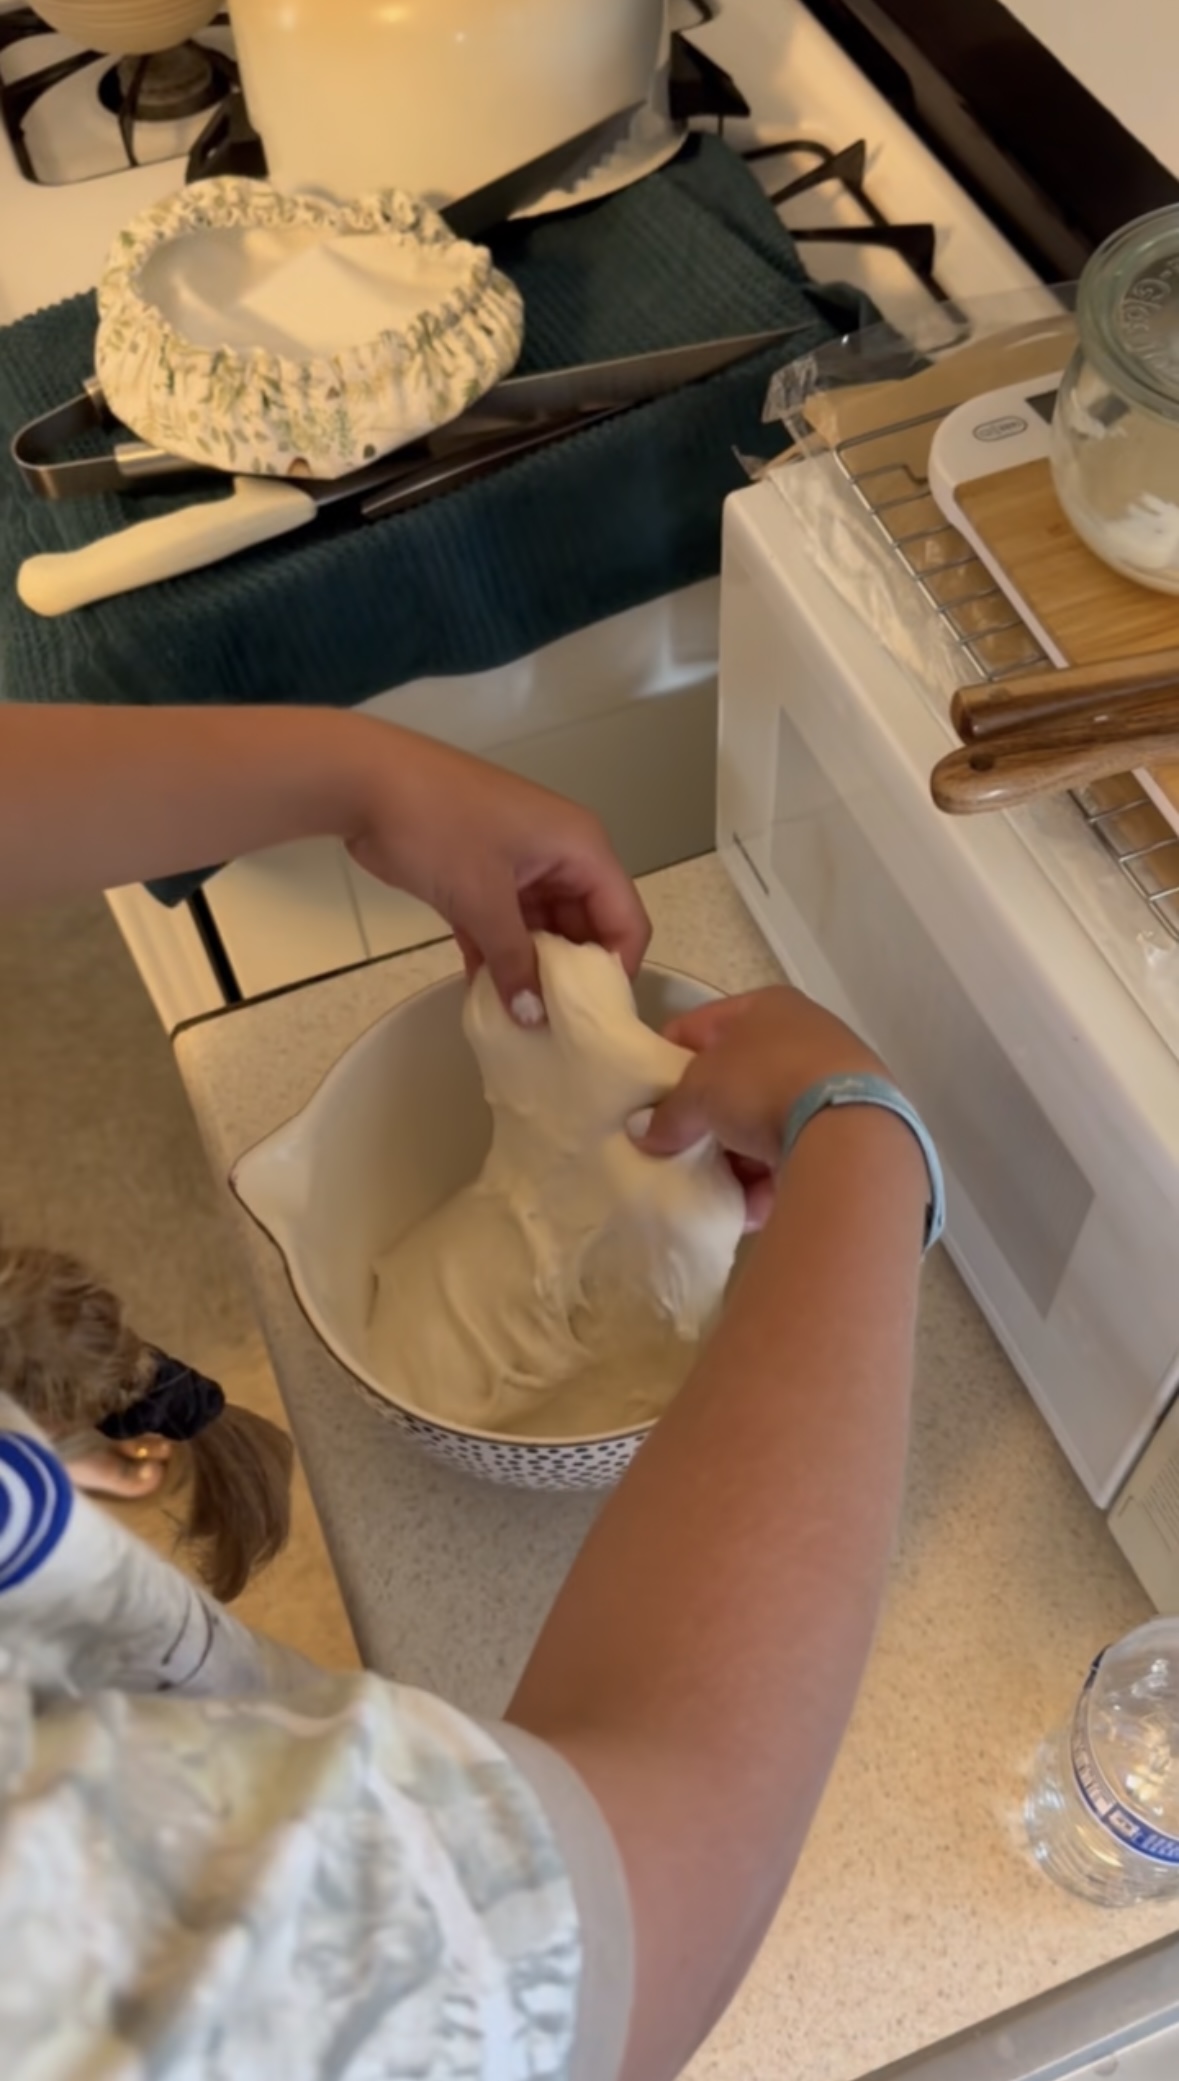
• Cover your bowl again and now it does it bulk ferment. This can take anywhere from 3-8+ hours depending on your house environment. Summer months it’ll bulk ferment faster.
• Keep checking on your dough. You’ll know it’s done bulk fermenting when it’s at least doubled in size and it’s not sticking to your fingers when touched (still will be sticky but not sticking to you)
• Once it’s done bulk fermenting it’s time to shape it.
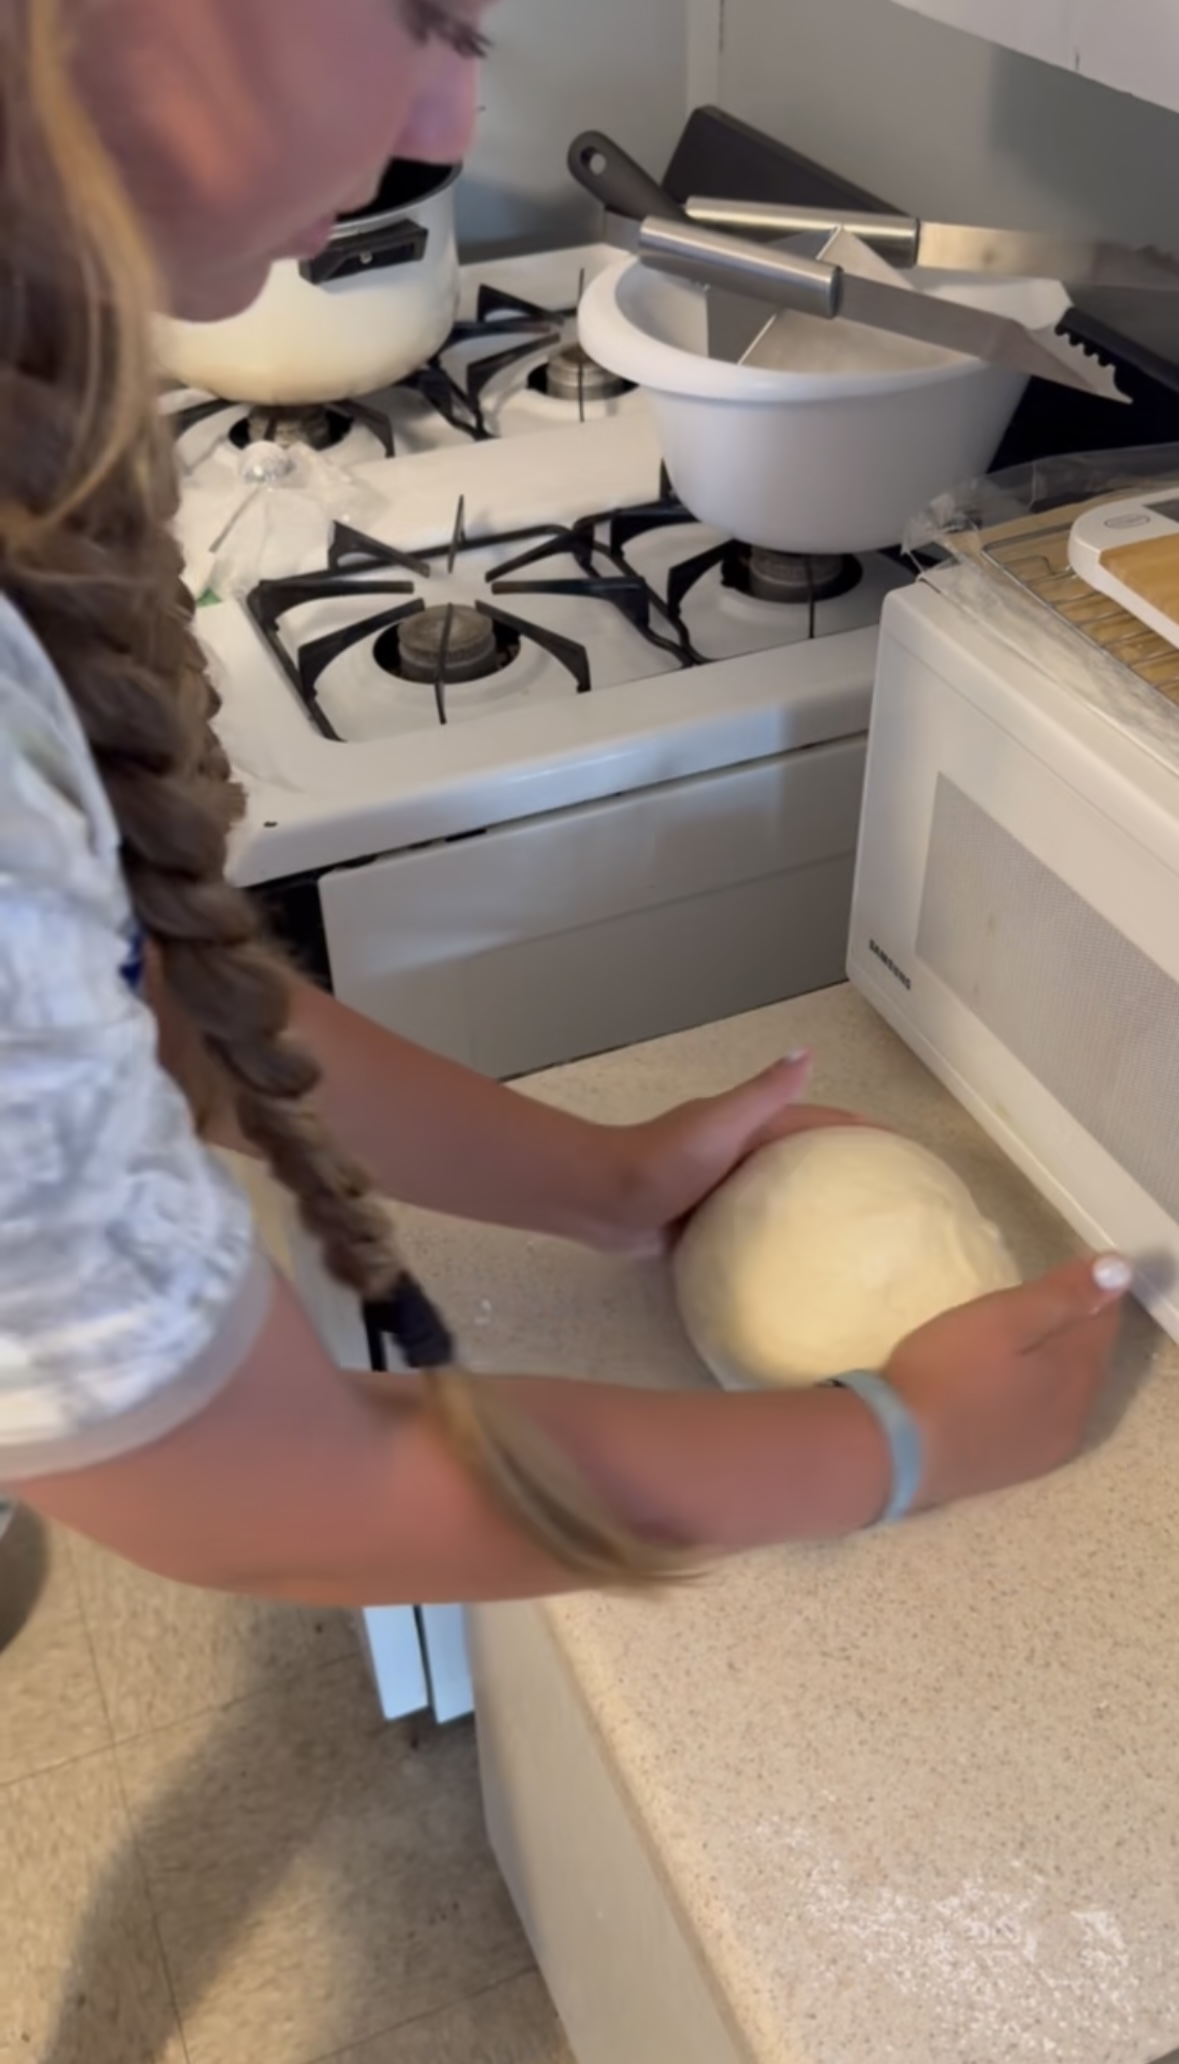
• Sprinkle some Thai rice flour on counter and let the dough naturally fall out of the bowl.
• Gently lift corners of your dough inwards.
• Roll it into a ball (there’s a couple different ways of shaping dough you can always look it up and watch some videos)
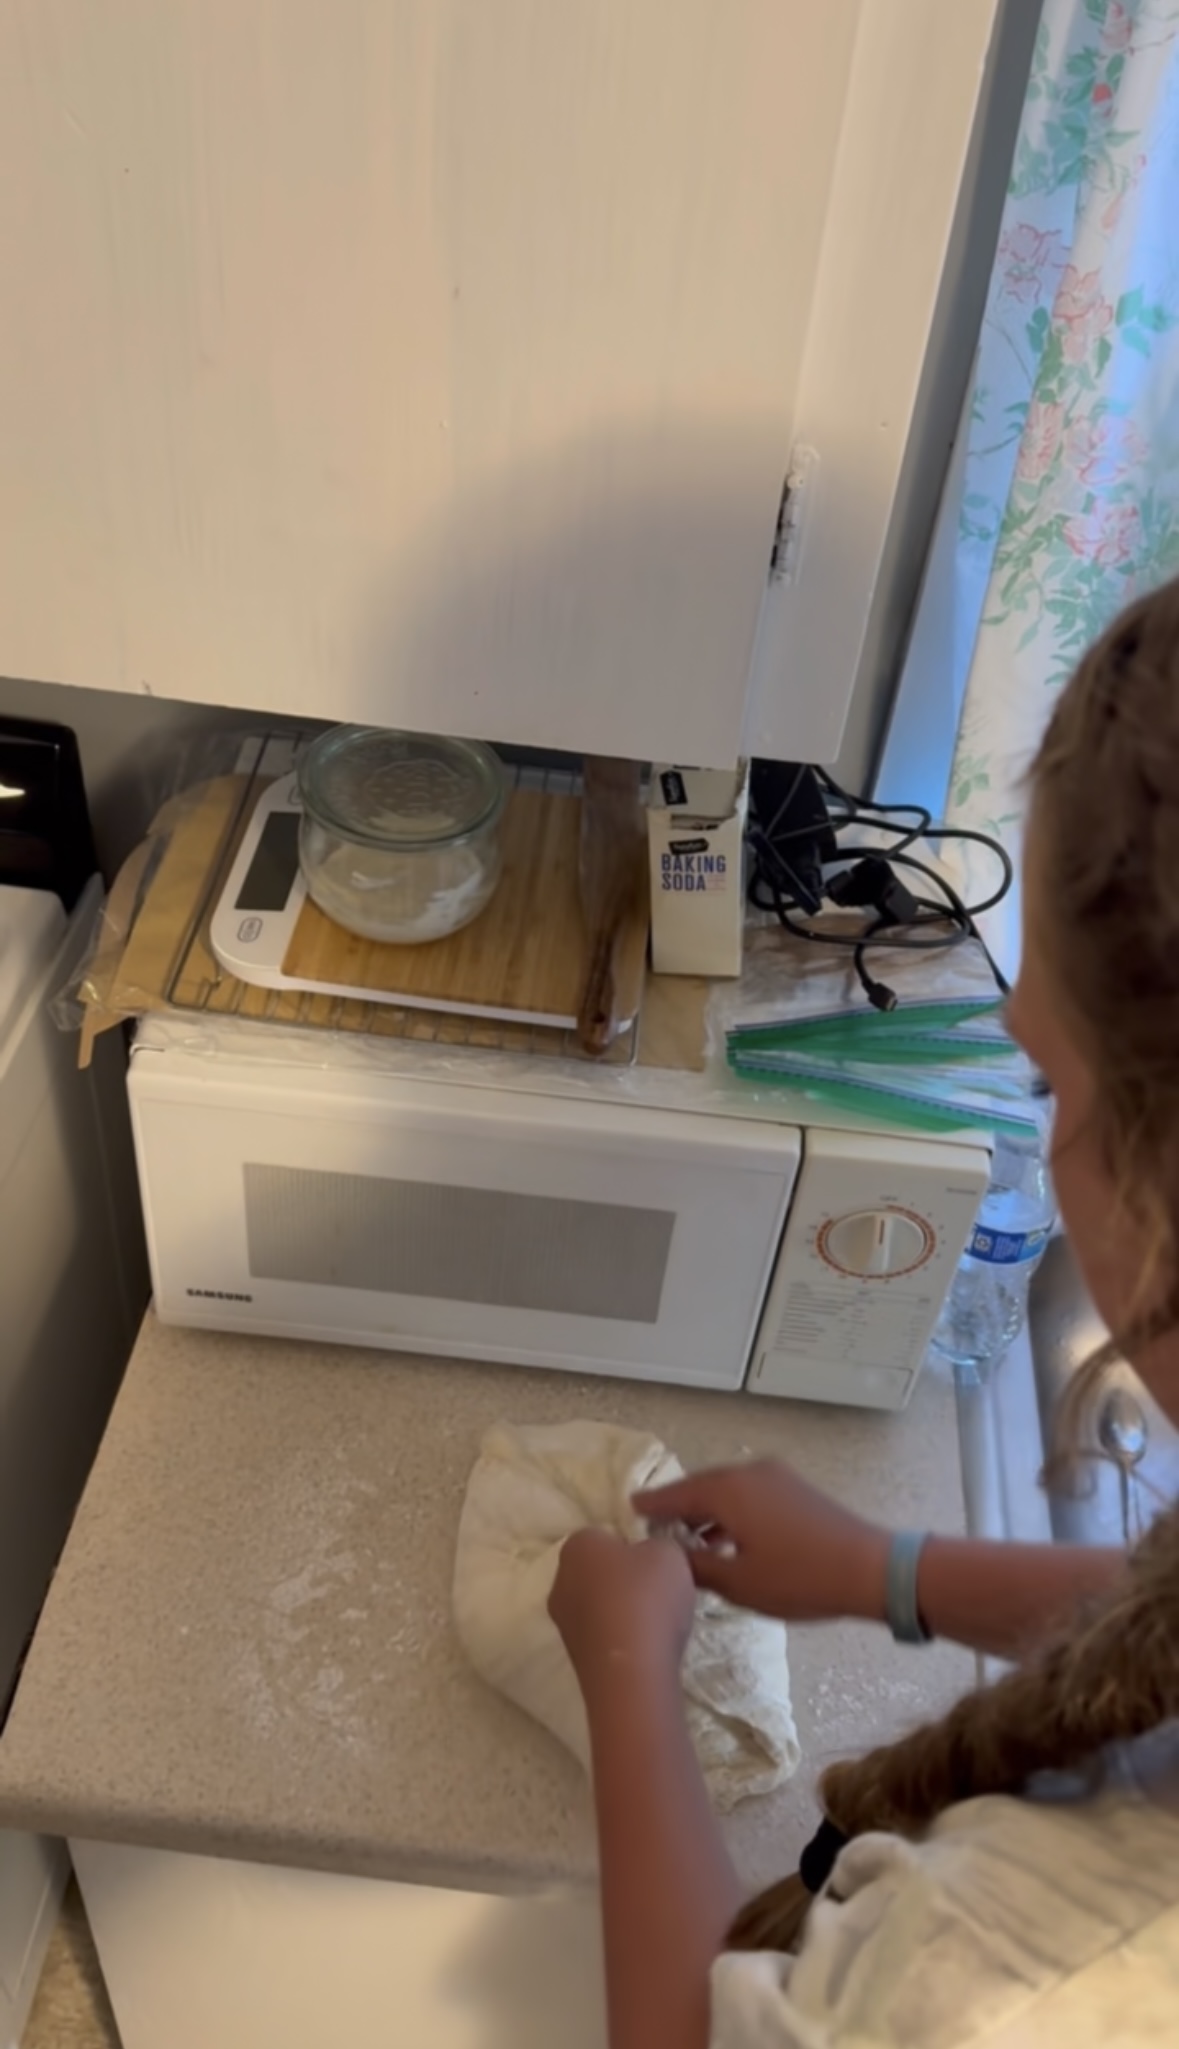
• Then you’ll gently push the dough and pull it back towards you while tucking the bottom with your fingers. This is helping the top of the dough get taut (watch this carefully as you don’t want the dough to start tearing) it will become this nice little smooth ball of dough.
• Sprinkle your Banneton basket with rice flower and place the top of your dough in the bottom of your basket (that way when you flip in out of the basket to bake the top will be right side up)
• Stitch the bottom of your bread closed by pinching the bottom together so the isn’t any big holes or crevices.
• Cover with plastic bowl cover and place in the fridge for anywhere from 12-48 hours (the longer it sits in the fridge the more of a sourdough flavor it’ll have) I usually let mine sit in the fridge overnight and bake the next morning.
Next day:
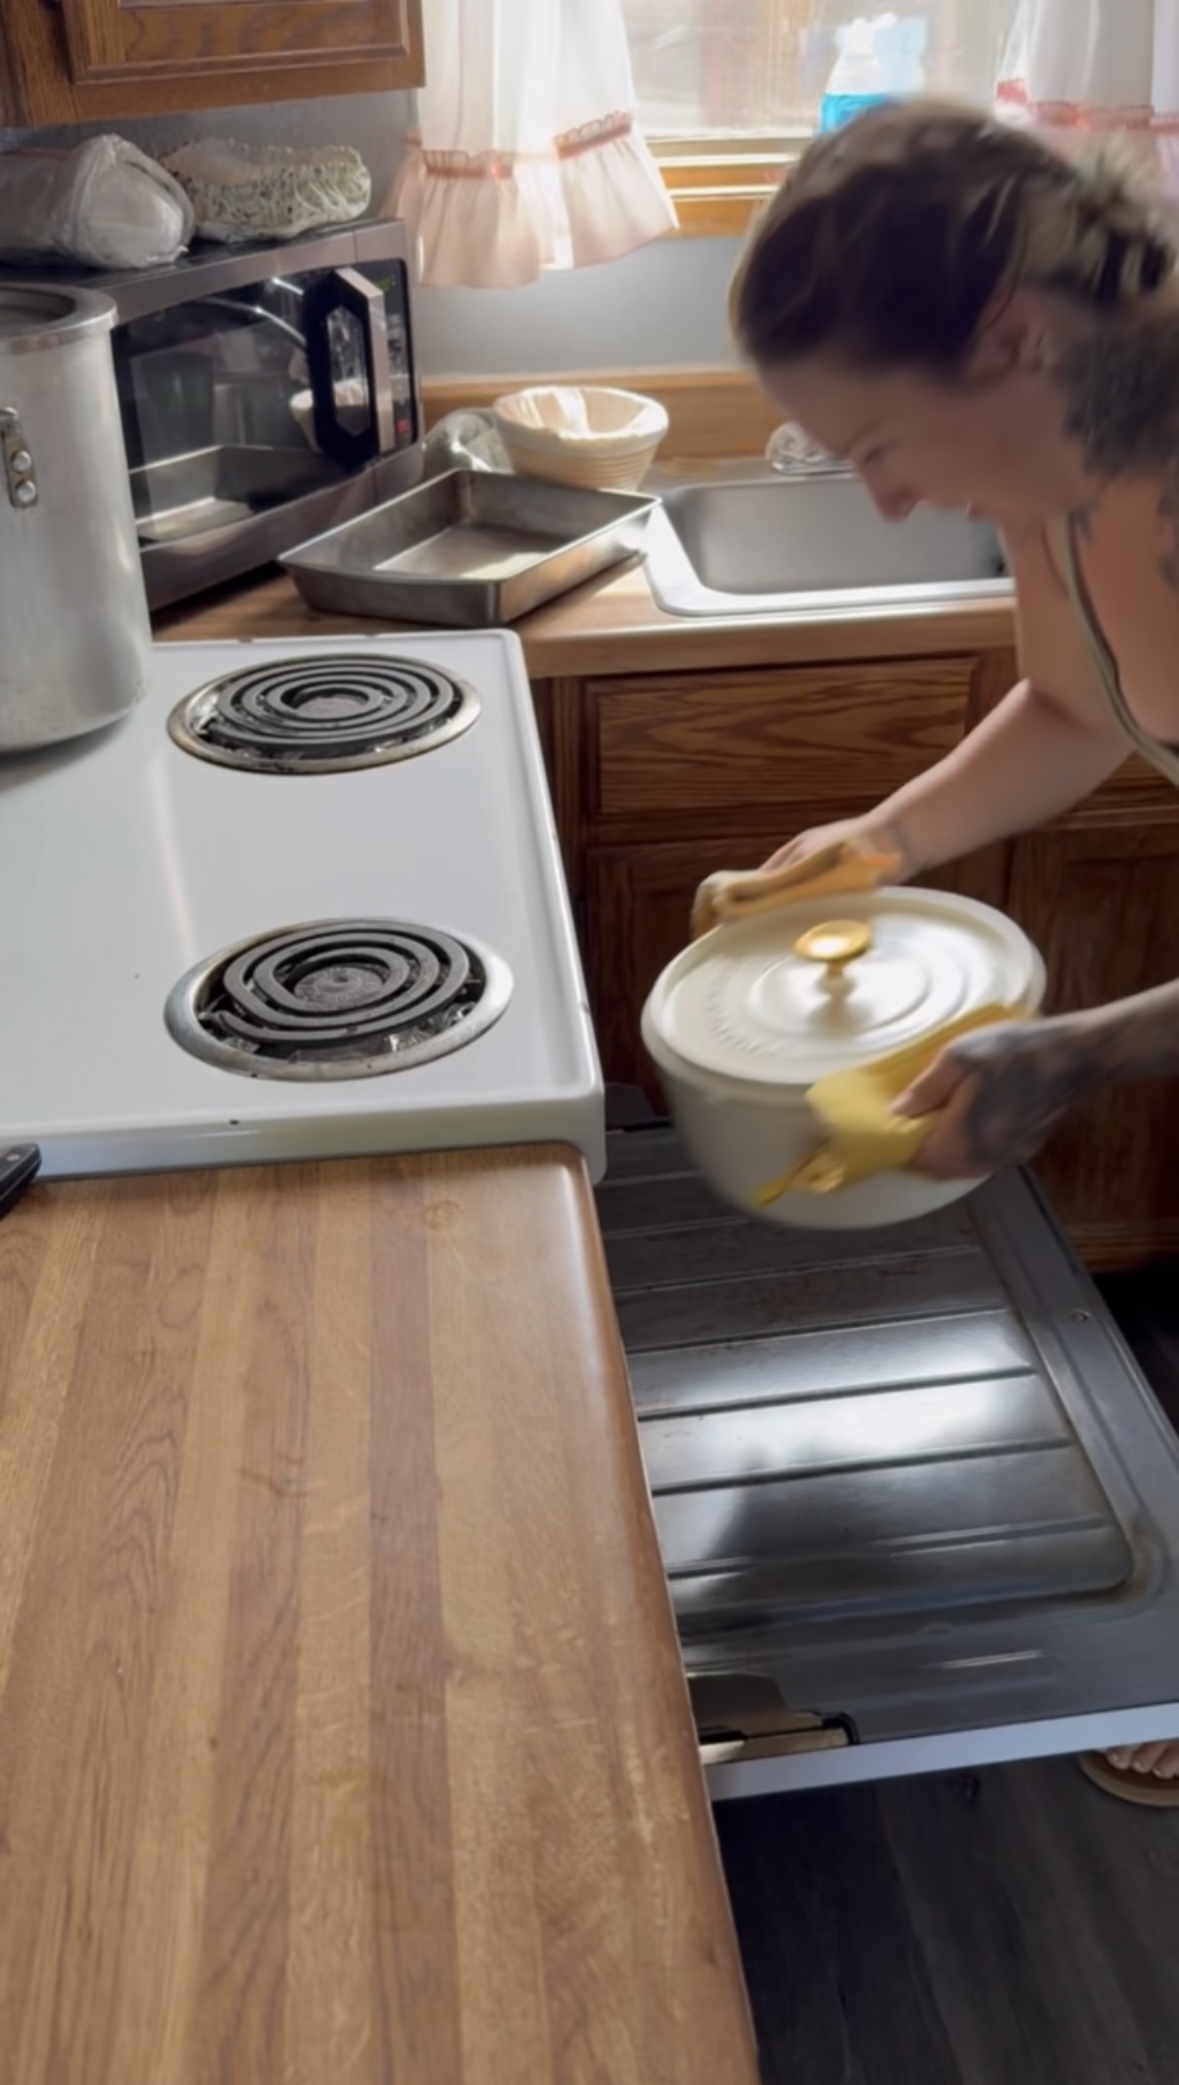
• Place your Dutch oven (with lid on) in the oven and turn on to 450 let it heat up for one hour
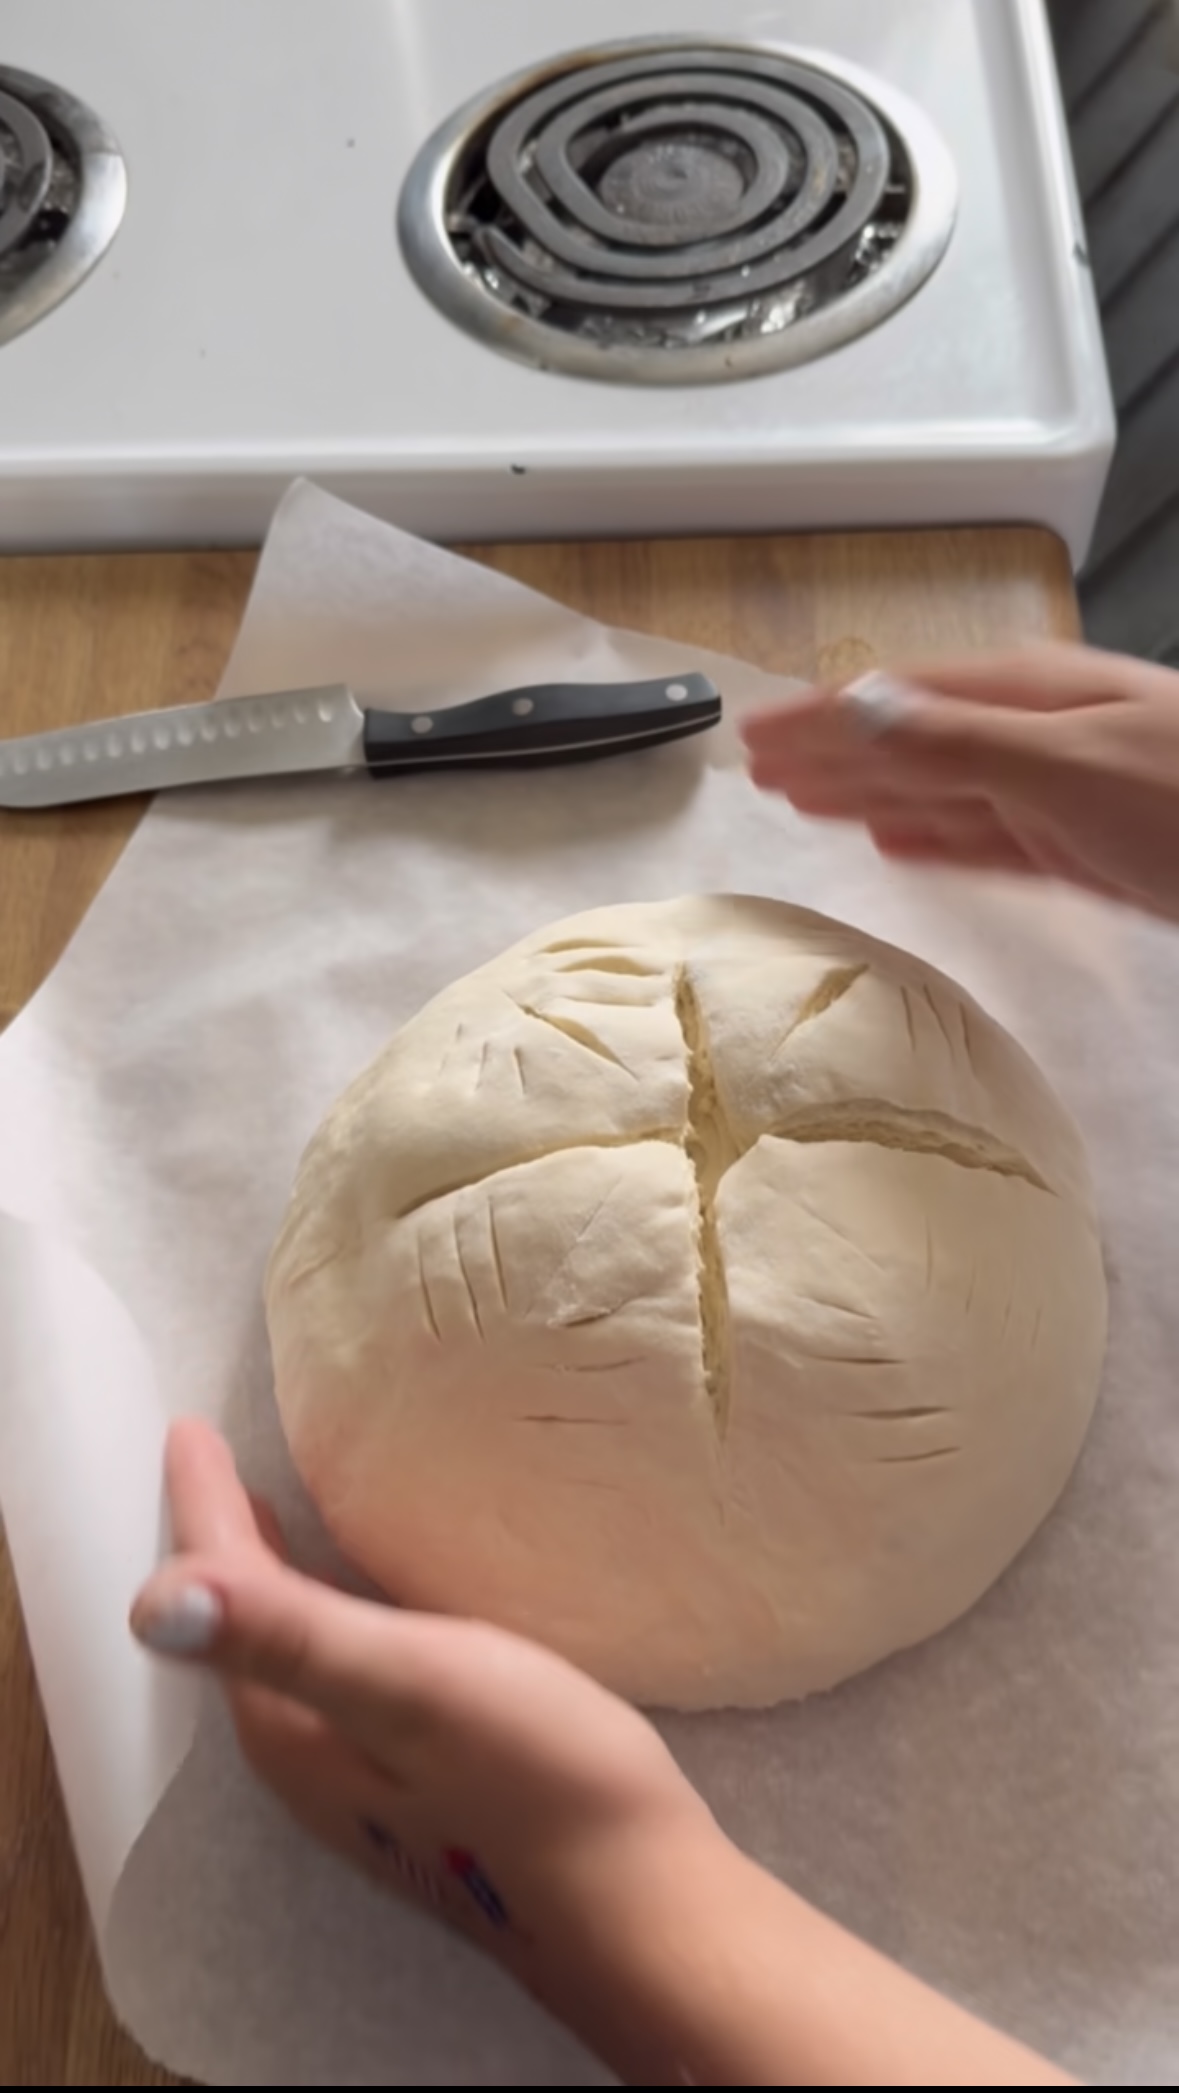
• After 1 hour get dough out of fridge and place on a piece of parchment paper.
• Score your expansion score (it can be a cross on top or on longer score on top but off to the side) score whatever design you’d like, this is where you can be super creative! You want your expansion score to be about 1/4-1/2 inches deep and your decorative score to be just through the top layer of dough, very superficial.
• Place in Dutch oven and cover with lid and place on center rack of oven. Also place cookie sheet on bottom rack of oven to help prevent the bottom of your loaf from burning.
• Bake for 30 minutes
• After 30 minutes remove lid and continue baking for another 10-15 minutes depending on how toasty you like it.
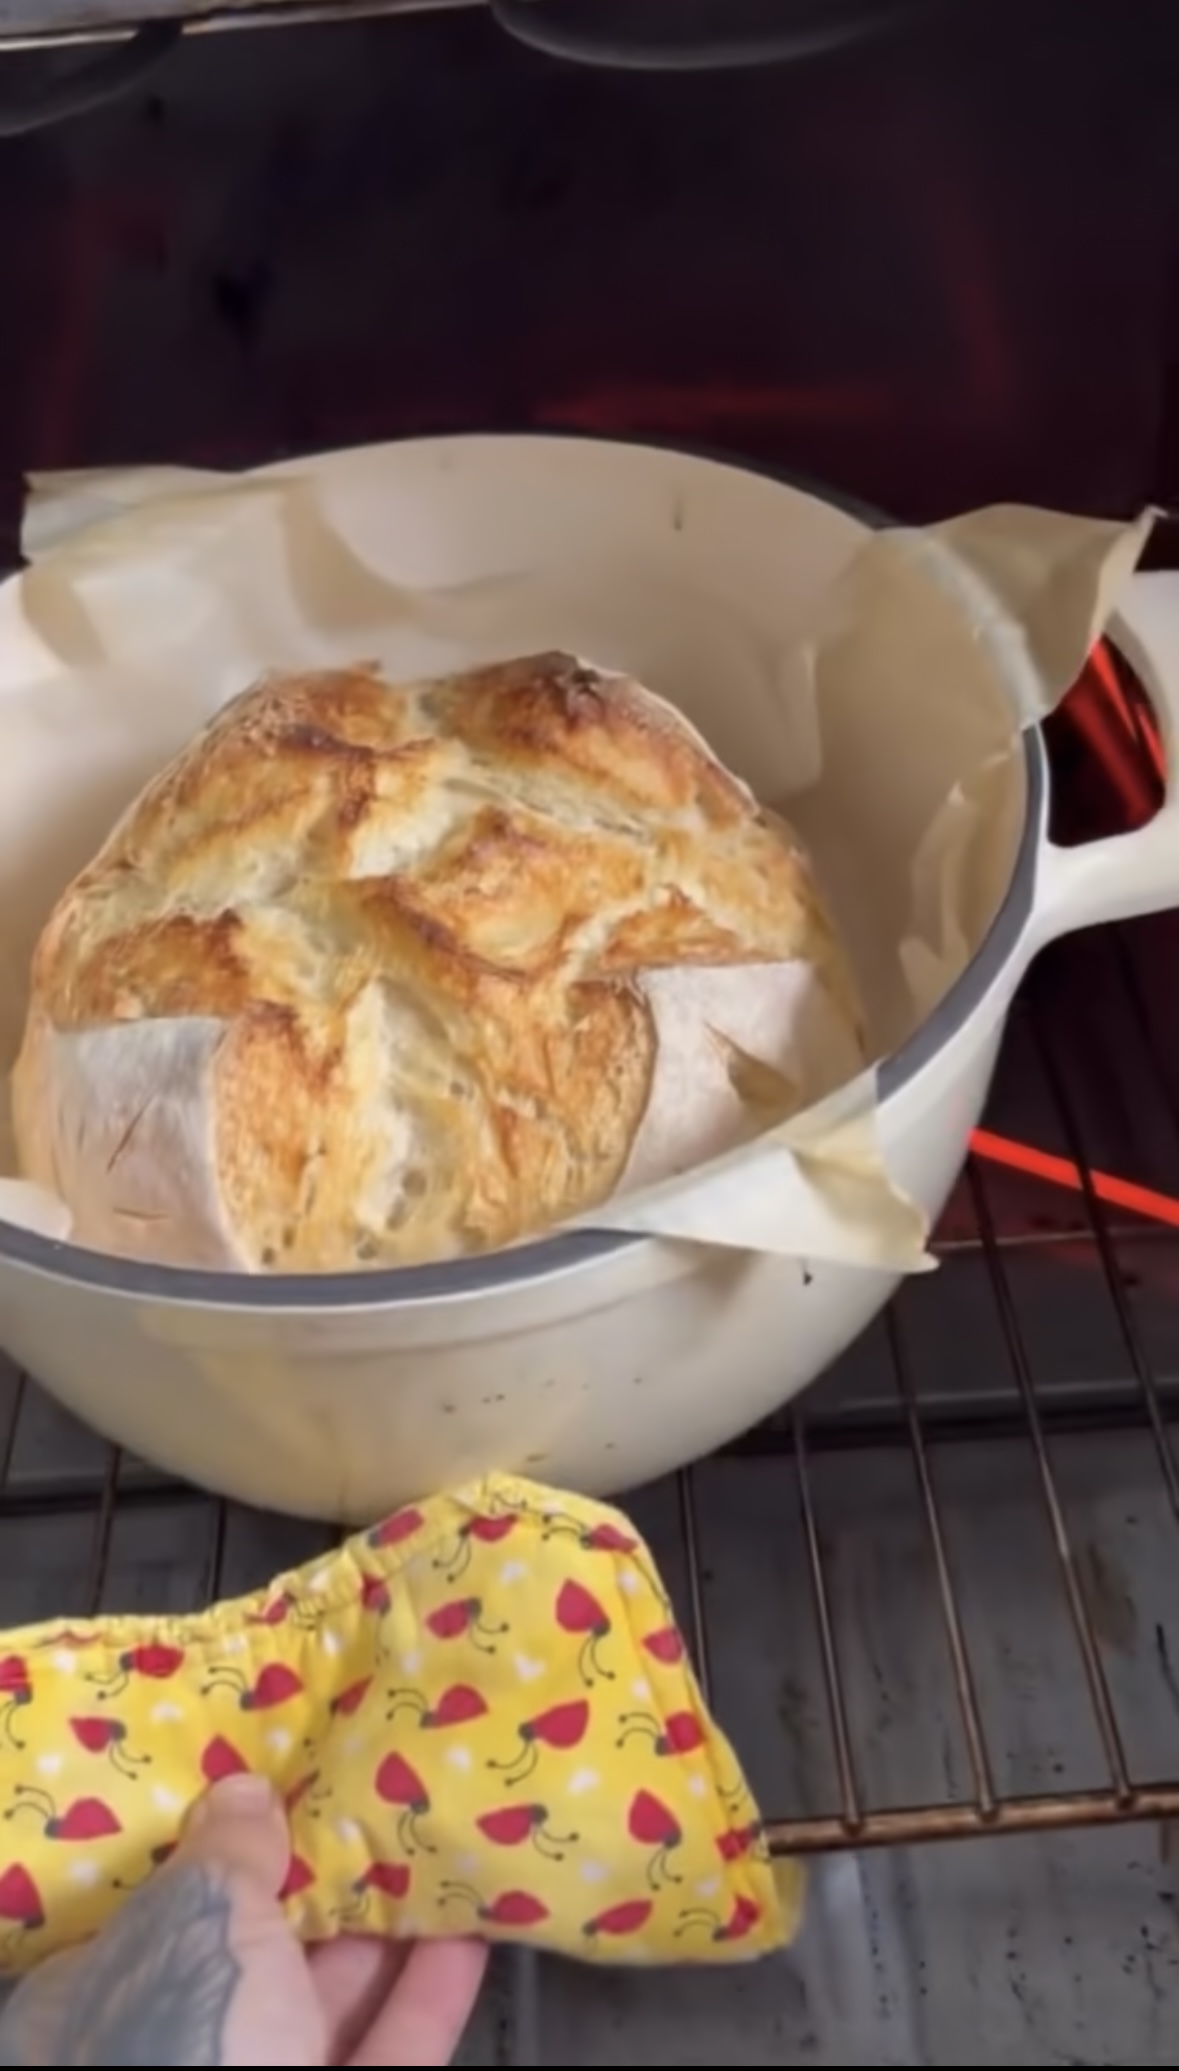
• Remove loaf from Dutch oven and place on a cooling rack for at least 1 hour before cutting this helps trap in the moisture and gives you bread more of a soft pillowy texture.
• Enjoy!!!
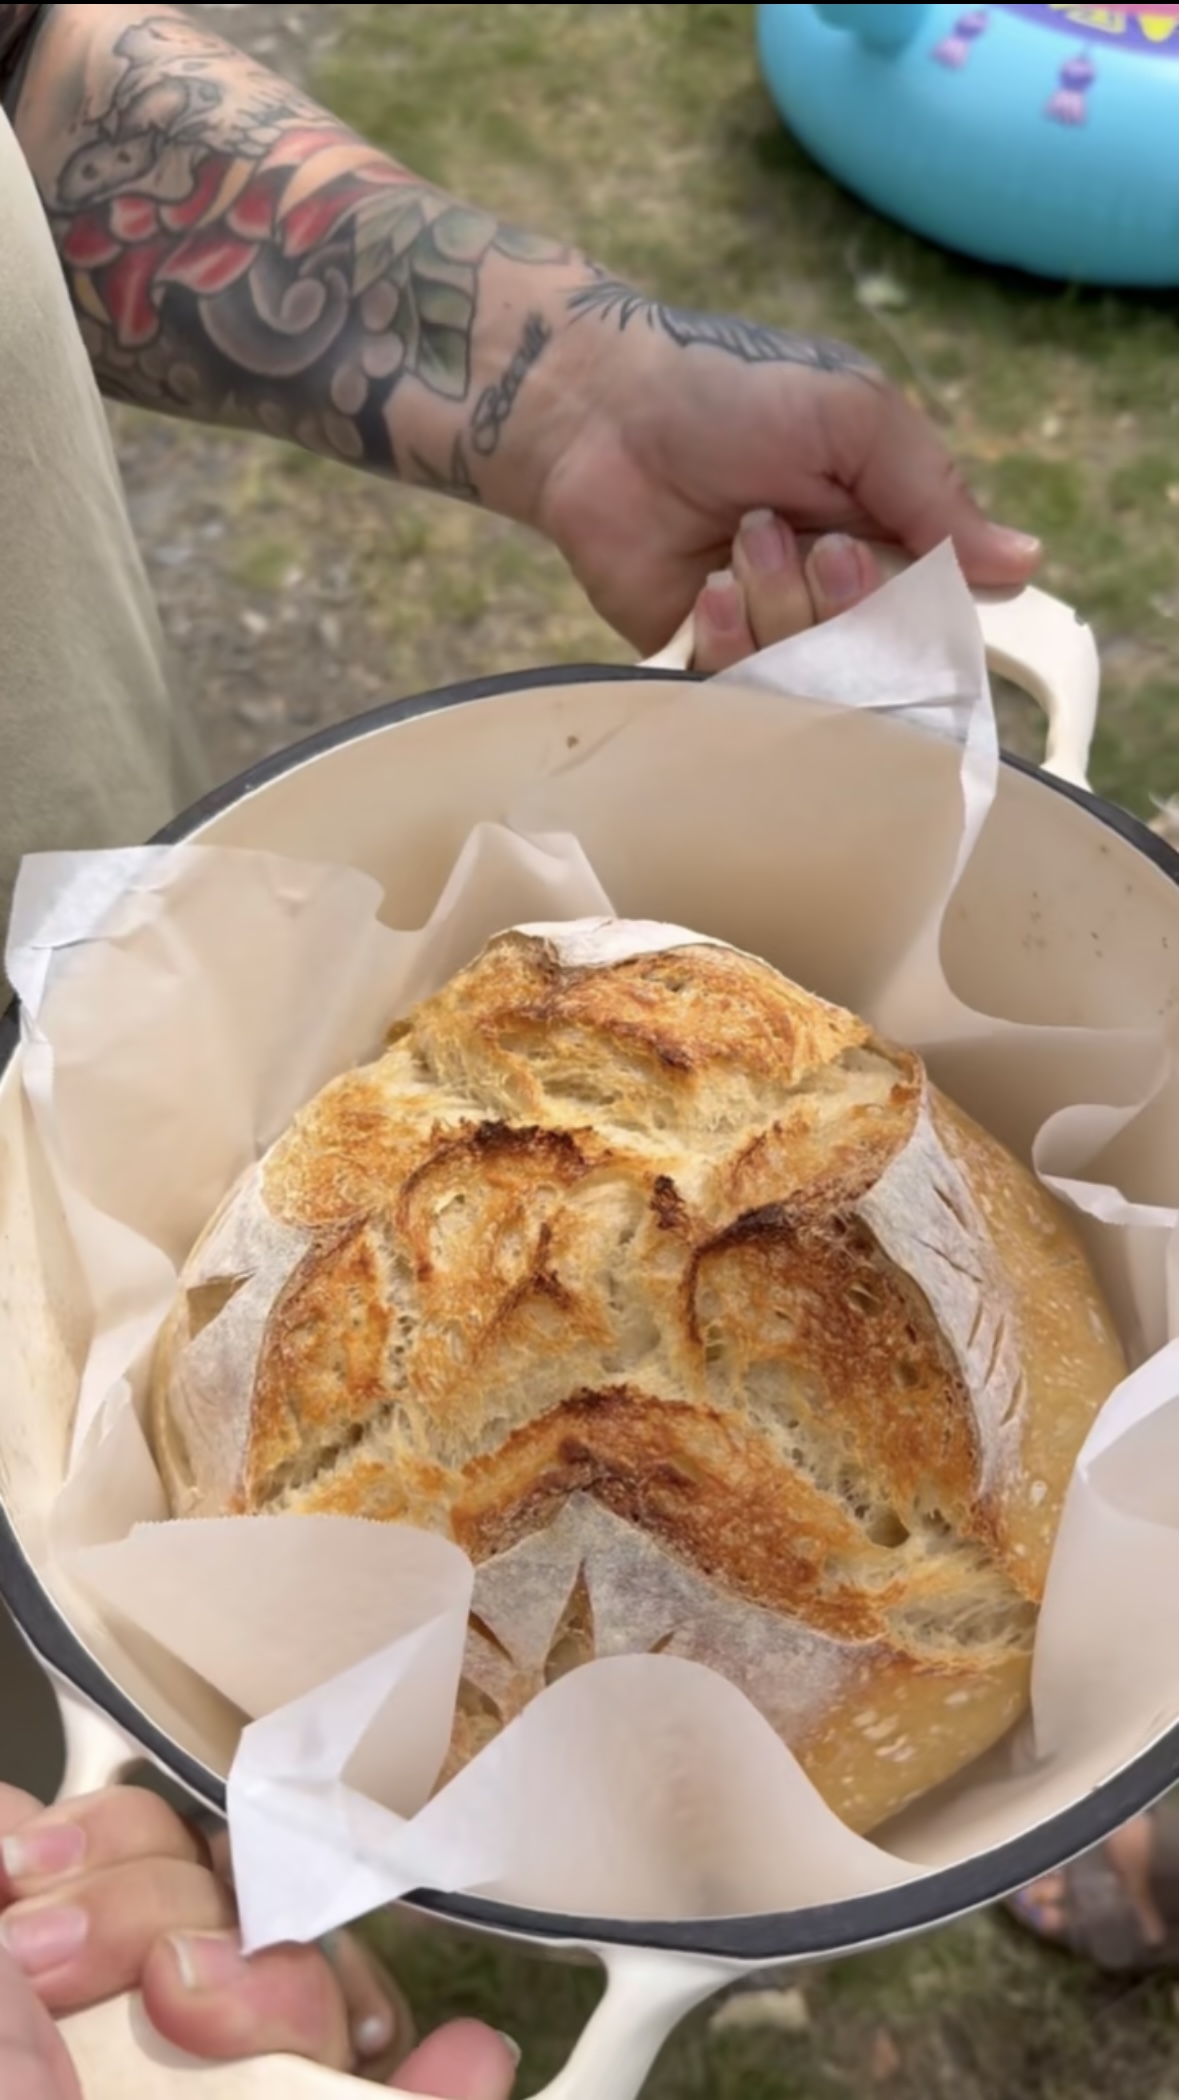
Once you’ve got the hang of making loaves you can start adding in inclusions like cheese, bacon, garlic, the list goes on!
A very special thanks to Kim @simply.mystic.glass for showing Gwyn the way and sharing all of her tips and tricks with us. So incredibly kind!


Thanks for all the info. Don’t mean to be a bother but how would I print this out?
Thanks for taking the time to answer.
j
If your on your phone click the 3 dots at the top and select, open in external browser. Then hit the arrow up at the bottom of the page, as if you are sending it out to somebody. Scroll down and select print or send to printer.
Can I get this sourdough recipe in a email please? Looks like the easiest one I’ve seen.
What size Dutch oven? Thank you!!
Newbie here to sourdough. I just got my starter going good. Thanks for posting.
Can this be emailed
Thanks for this~ Loved Camping Along with the Family.